Recently I received a question, more exactly, how to Separate Existing Hatches? As the Hatches are quite an important part of our drawing, I really Like to write about them. We already discussed how to Join Separate Hatches and even how to Create Separate Hatches from the scratch.
Today, however, we will see how to Separate an Existing Hatch object into several different ones based on their boundaries. As it would be very annoying to be forced to erase the existing Hatch and redo the entire thing using Separate Hatching.
So what is the Trick? How can we Separate Existing Hatches in AutoCAD?
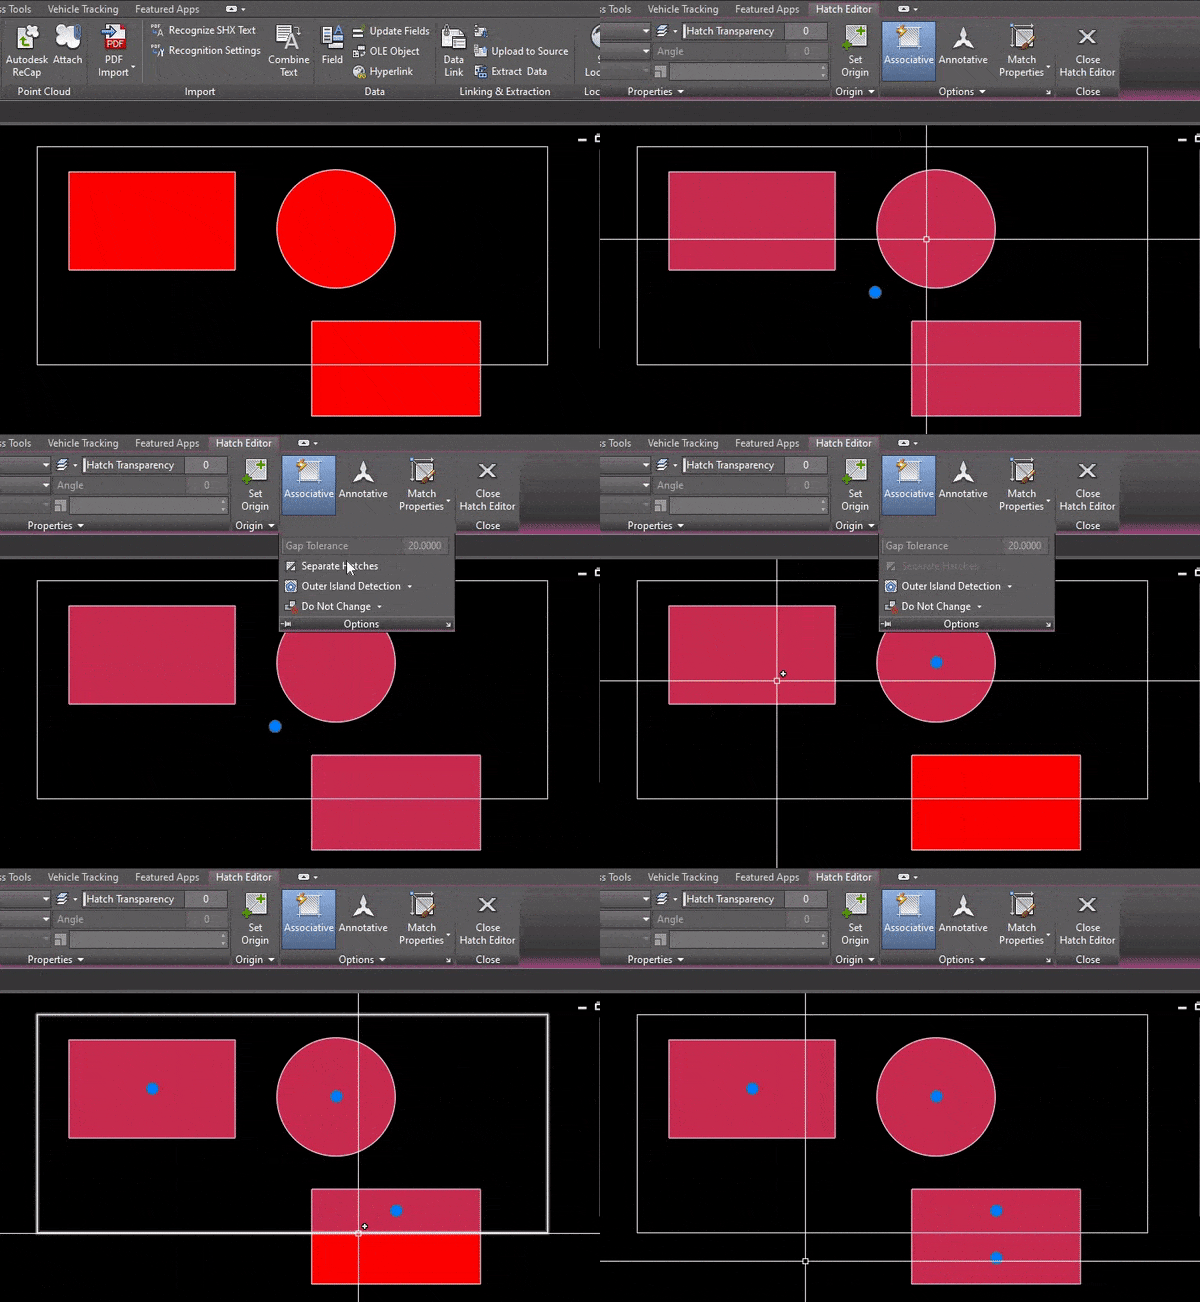
- First, select the Hatch that would be separated into different pieces.
- Then, on the Contextual Hatch Editor ribbon tab, under Options hit Separate Hatches.

That is it! Just two Clicks of the Mouse. It is great that Autodesk has given us this option, for not just creating separate hatches from the scratch, but also separating them on a later stage.

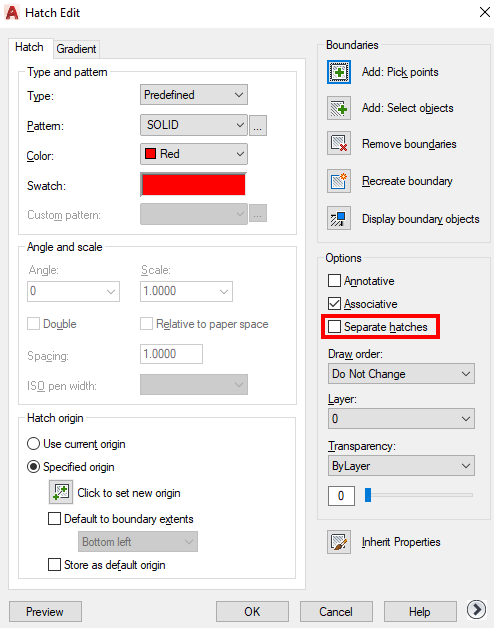
Note: If you don’t like to use ribbon tabs, the other way to get to the button is to select the Hatch and go to Hatch Edit. There under Options you can find Separate Hatches, put a tick and hit OK.
Hope you the advice useful!
Don’t forget to check out our other AutoCAD Tips and Share the post with your Colleagues!

