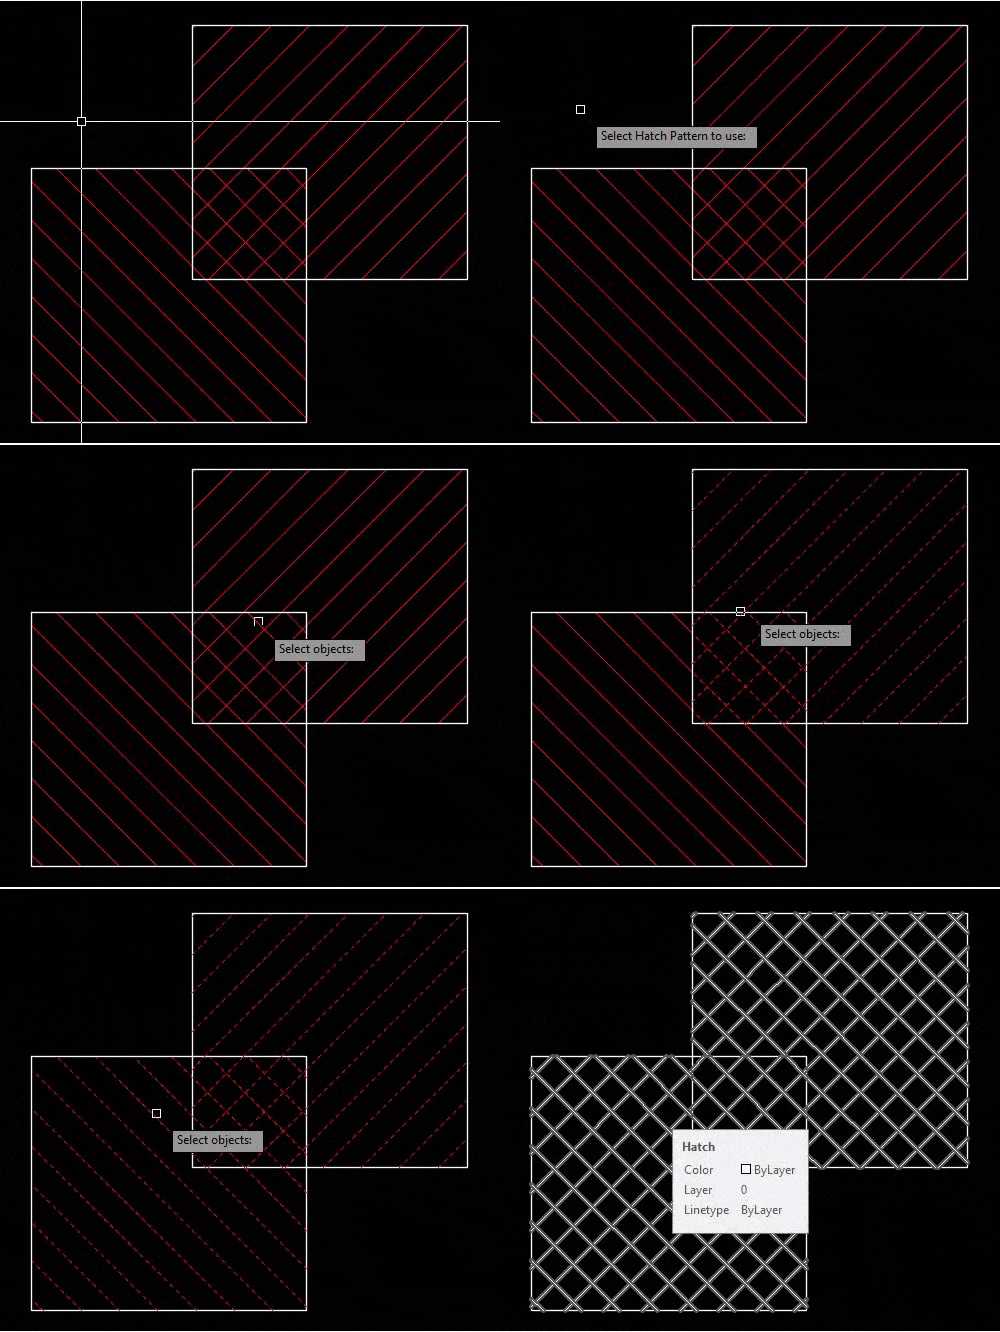
In a previous post Create Separate Hatches Fast and Easy! We have discussed, how to create Separate Hatch objects as easy as possible. But what if, we or someone else has created Separate hatches and now we have to Join those hatch objects into one?
This can be applicable for example when there are lots of hatches and you would like to make selection easier, or to make the pattern uniform, or generate an outline…
Join Hatch in AutoCAD
To complete the task of joining hatches together, we will go through a step by step process:
- Download a Lisp from here, and load it. (Learn How to use Lisp programs effortlessly)
- Start the Lisp by typing MH on the command line.
- AutoCAD will now ask you to select a hatch that contains the pattern you would like to use.
- Now select all the hatches that you want to be joined together.
Note: Even though you already selected a hatch to specify what pattern to use, you need to select that hatch again so that it is included in the selection set for merging. - Hit Enter to finish!
As easy as it is!

Find out more great AutoCAD Tips.


Thanks for your efforts and it helps world wide cad users. God bless you..