Separate hatches in AutoCAD? Everyone knows that!
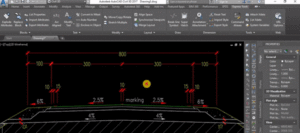
This week we had in our office some engineering students from Architectural University who wanted to see how work look in the real world. Their task was to make some typical cross sections of roads. Usually, we place different hatches for different layers, so they had to do the same. However as I passed through I saw that they are making one hatch, then hit ok, then make another hatch and so on. This could take twice as much time as creating all hatches with just one use of the command.
After we explained to them how to create their hatches faster with much less effort, they looked really amazed.
So the young students are my inspiration to create this post about something as simple as creating hatches. Here we would look at how to create separate hatches without the need of starting HATCH command for every hatch.
So how to do the trick?
It’s very simple we just have to start hatch command by typing HATCH, then in the Hatch Creation ribbon tab under Options drop-down list we can see the tool – Create Separate Hatches.

Now as we have the option selected can start Hatching without stopping to create new separate hatch! A piece of cake!
Note: If we want to go back to normal Hatch creating we can always go back to Hatch options and click once again on Create Separate Hatches!
You can take a look at this little demonstration:


