In the realm of civil engineering design, precision is paramount. This blog post is your guide to mastering Elevation Label Formulas in Civil 3D, specifically focusing on creating expressions that add a constant to surface label elevations.
For example we will add a constant of 0.5 feet to all Edge of Pavement elevations to calculate the Top of Curb elevations with ease!
Whether you’re a seasoned pro or just starting, discover how to seamlessly integrate constant adjustments into elevation labels, enhancing accuracy and alignment with project requirements. Join us in demystifying the process, step by step, and elevate your Civil 3D designs with newfound precision. Let’s dive in and enhance your workflow efficiency.
Expressions in Civil 3d
Civil 3D expressions play a crucial role, residing in the Settings tree within label style folders. Notably, they aren’t applicable to label style types lacking relevant properties, such as Note label styles. However, they prove versatile, being accessible across various label types like surface, alignment, profile, and more.
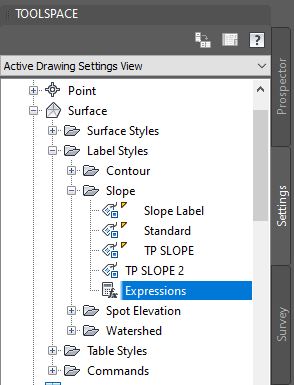
When editing a label style text component, expressions are inserted using the Text Component Editor. Leveraging the same properties found in label styles—such as Point Elevation, Northing, and Easting—expressions enable the creation of distinct mathematical formulas. The process involves two key steps, navigated through the New Expression dialog box.
Insert property – Add a property to the expression by selecting from a list of options relevant to the expression type. These properties match those available for label styles and should be enclosed in brackets.
Insert Function – Incorporate functions like IF(test, true_val, false_val) into the expression for added customization. This allows for specific operations and logic within your expressions.
Previously we’ve discussed how to leverage the power of expressions and Declutter Your Drawings: Show Only the Last Two Digits of Elevation Labels in Civil 3D
Expression example: Add a constant to Surface Labels
This is a straightforward expression example. Our goal is to create a Surface Label for the Edge of pavement and Top of Curb with 0.5 feet difference.
Let’s dive in step by step:
- Navigate to the SETTING tab, expand Surface, label styles, and Spot Elevation. There right-click on Expressions and select New.
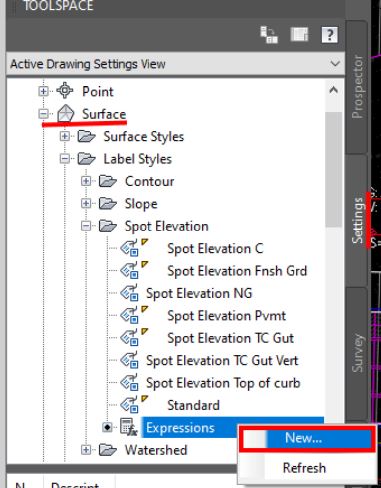
- A window will pop up, called New Expression, there
- Add the name of your expression for example “6 inch vert top curb”
- If you want you can add a description for better clarity.
- Change the format result to Elevation
- In the Expression Editor, insert {Surface Elevation} from the Insert Property drop-down menu.
 And type in + 0.50.
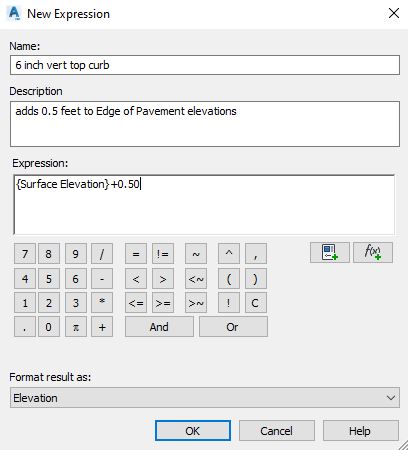
- After that, you can hit OK to save your expression.
- The next step is to create a Spot Elevation Label with the new expression. Add a new Spot Elevation label.
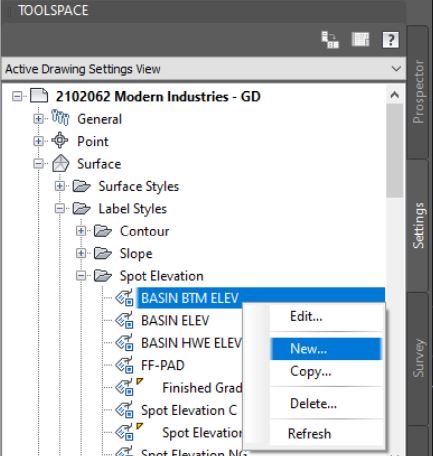
- The Label style composer will open, there:
- On the Information tab, type in the Name of the new Spot Elevation Label for example “Spot Elevation EP TC Vert”
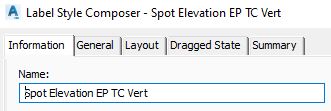
- Then go to Layout, and create two text components, one for the Surface Spot Elevation called EP and the other referencing the new Expression (Top of Curb).
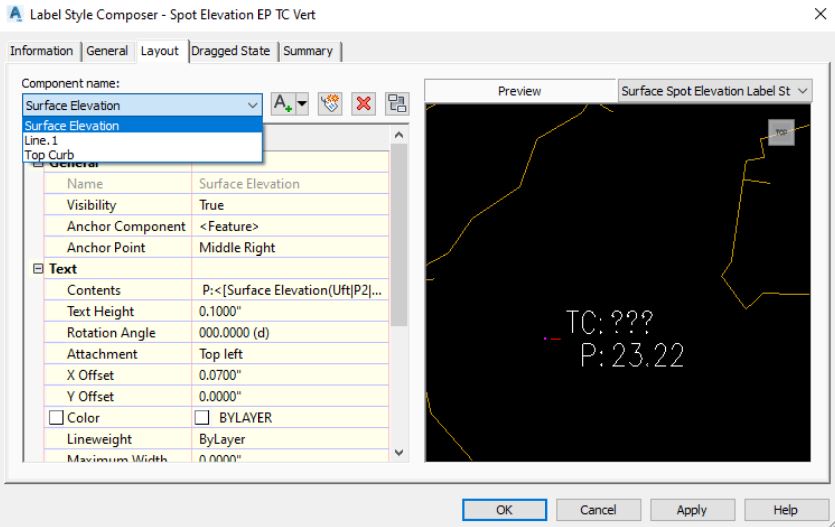
- To add the Spot elevation and Top of Curb Elevations, on Contents, click on the 3 dots to open the Text Component Editor.
- There, from the drop-down menu, select first Surface Elevation, and then, for the TC the new Expression “6 inch curb top”
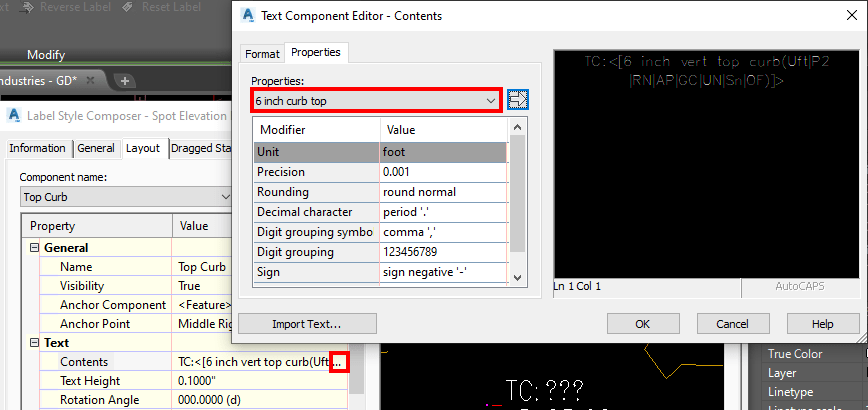
- On the Information tab, type in the Name of the new Spot Elevation Label for example “Spot Elevation EP TC Vert”
- Click OK both on the Text Component Editor and Label Style Composer to finish the label set-up.
- Lastly, utilize the ADD LABELS dialog box to apply the newly created label to desired spots.
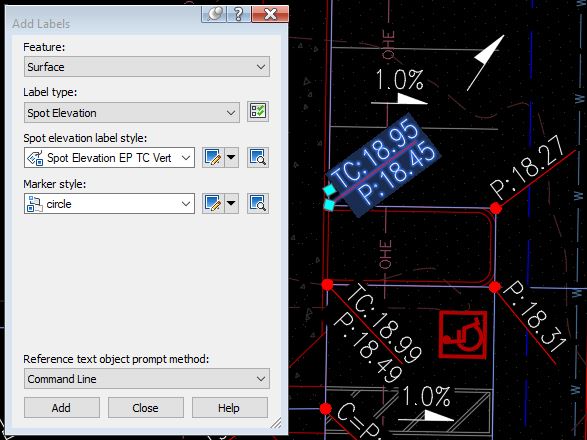
By following these steps, you’ll witness the dynamic impact of your expression, showcasing the calculated elevation difference seamlessly in your Civil 3D design. Enhance your labeling precision and efficiency with this tailored guide.
Check out our other Civil 3D Related posts, and don’t forget to subscribe for more great tips like this one!

