Firstly, why should we Export Drawing to JPG or PNG
This is a fair question especially when PDF files are having great quality in our days. However, there are lots of people that are not that tech-savvy. You may need to send a Picture of a Drawing to a Client, a part of a drawing, etc. Exporting DWG to JPG or PNG may be a really useful trick for any professional.
The Problem? Where is Export Drawing to JPG?

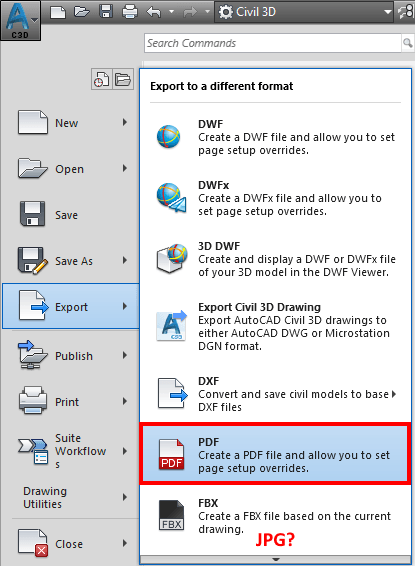
Usually, when thinking of creating JPG or PNG file we think of “Export“. The process, however, is a little bit different. When creating JPG/PNG files we don’t export the drawing we Plot it. This is why most of the people search how to Export to JPG not to Plot to JPG. The process is the same as creating a PDF.
When creating PDF for example AutoCAD plots the drawing onto Virtual Plotter which instead of on paper plots our drawing on PDF file.
Autodesk realized that most of the people search for “Exporting” not “Plotting” file and gave us a shortcut in the Export menu. They, however, forgot to give us an option/shortcut to “Export” to JPG.
Solution: How to Plot to JPG/PNG (DWG to JPG)
Well, the process is quite simple in fact. When we want to Export our Drawing to JPG/PDF we go and plot it as usual.
1. First, open the Plot window.
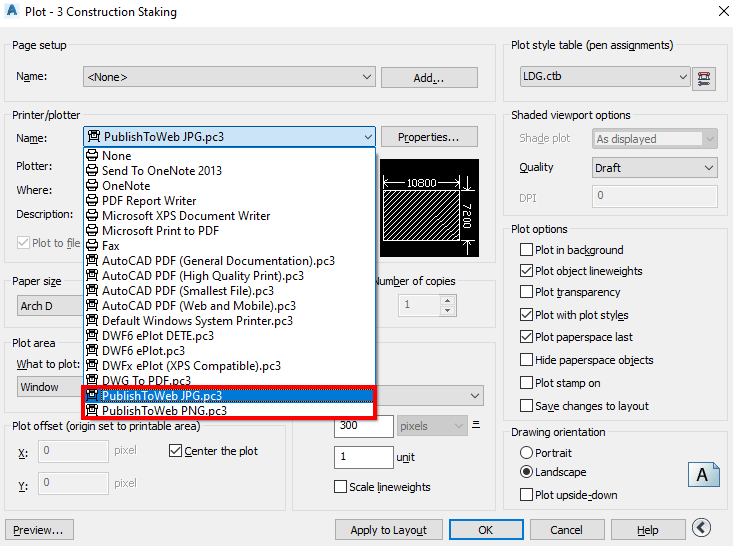
2. Under Printer/Plotter choose the name of the printer.
– JPG – PublishToWeb JPG.
– PGN – PublishToWeb PNG.
3. Set your Paper size, Plot area, Scale and Plot style table just as you are plotting on Paper.
4. Hit OK!

Hope you found this information useful. Don’t forget to check our other AutoCAD Tips for more Tips and Tricks like this one.

