
Today’s post on How to create Surface from Blocks in Civil3D is a continuation of a previous post, more particularly, the post on How to Create Surface from Text in Civil3D (Also Assign Elevations to Text!).
As discussed there, we often receive files from other surveyors which are exported and can be very hard to work with. Sometimes, the points are exploded to text, other times, points are Blocks with assigned attributes but lack Elevations. This can be caused by the different software that Surveyors have used, so don’t be too mad at them.
Move Blocks to Attribute Elevation
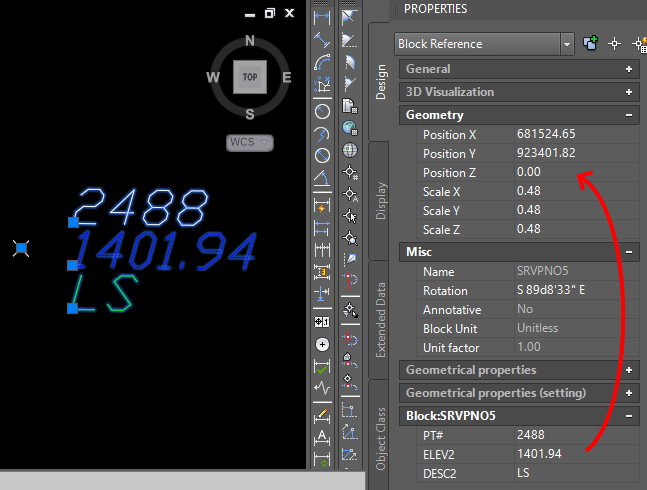
In the example we are looking at today, we’ve got AutoCAD Blocks with different attributes, one of which is the actual Elevation of the point. This is great, however, under geometry properties, we can see that the assigned object Elevation is 0.00. So in order to create a Surface from these Blocks, we first are going to assign all of their Elevations.
Don’t worry, we are not going to do that manually. To help us move Blocks to the right Elevations Civil3D has a built-in function Move Blocks to Attribute Elevation. Follow the steps below to complete this task:
- Isolate all the Blocks that will be used for the creation of a Surface.
- After we are left with the Blocks that represent the points and got Elevations in their Attributes we go to the Modify Ribbon tab and under Ground Data select Surface.
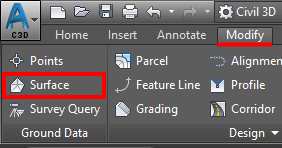
- A new Ribbon tab will Appear called Surface. There under Surface Tools click on the Move to Surface drop-down menu and select Move Blocks to Attribute Elevation.

- A window will pop out, where, under Select block reference name, we select the blocks that represent the points in the survey file. In the example these are SRVPNO5. Under Select Elevation Attribute Tag, we select the tag that contains the Elevation. In the example the tag is ELEV2.
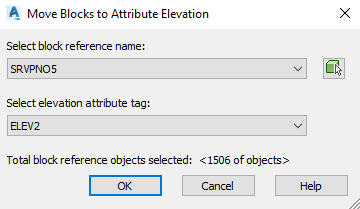
- Hit OK and the Elevations will be automatically set!
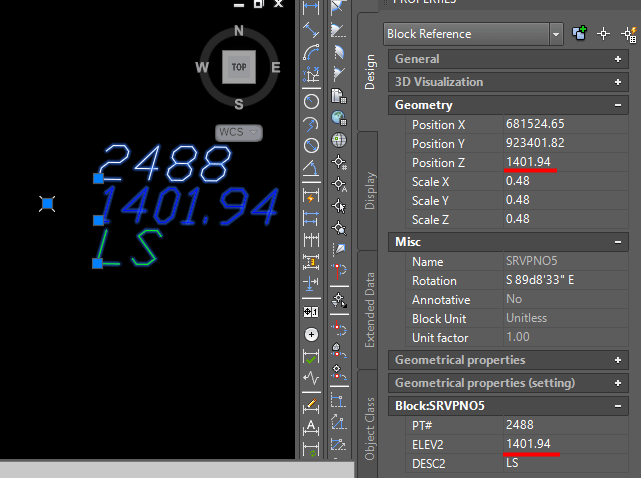
At this point, our Block objects have their Position Z property automatically filled in.
Create surface Using Block Objects.
At this point we just have to create a Surface using our block objects. To do that follow the steps below:
- First, create a TIN Surface the usual way on Home Ribbon tab on Surface drop-down menu select Create Surface and create a TIN Surface
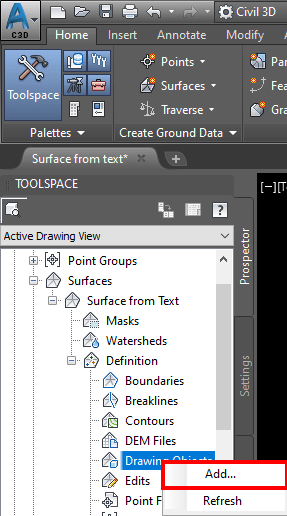
- Secondly, go to Toolspace under Surfaces expand Your Surface under Definition right-click on Drawing objects and choose Add…
- A window will pop up, Add Points From Drawing Objects. Under Object Type, from the drop-down menu choose Blocks.
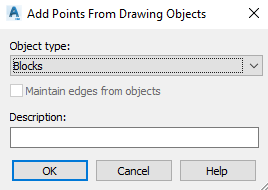
- Select the Objects and hit Enter!
That is it! our Surface is now ready!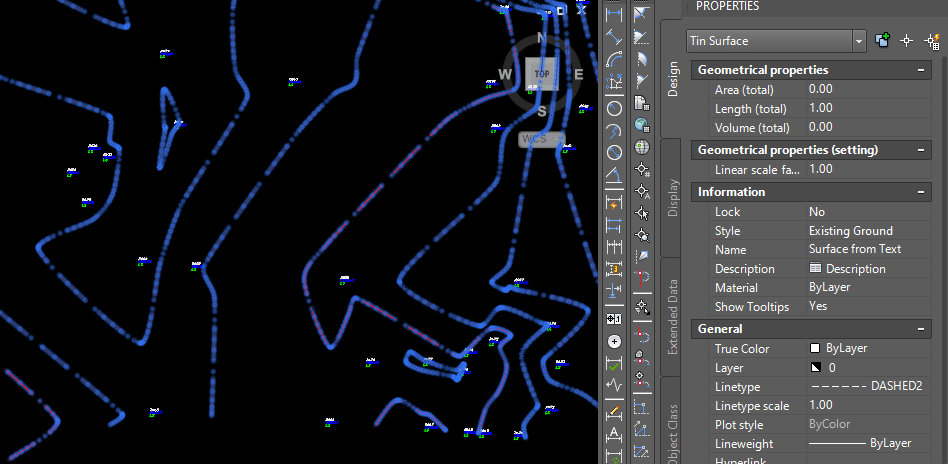
Hope you find this post useful! You can check our other Civil 3d tips and Tricks!
Hi Zlati,
I found these instructions very helpful, however, I have a follow up question. For me, the block of text is now what is associated with the elevation, not the point. When I click on the “x”, the elevation is 0 and no z is shown. When I click on the label number, elevation, and description block, I get an elevation. Is there a way to change the elevation association from the text block to the “x”?
Thanks.
Hi Jessica,
If I understand correctly, you have 2 separate block objects, one representing the “X” mark and one with the elevation text.
Unfortunately, I am not aware on how to “paste” the elevations from one block to another, based on the proximity. However, I can suggest you a workaround.
Can you try to edit the block definition of the block that carries the elevation label? In the new block definition add an X mark and move the insertion/base point of the block to the new “X” mark. That way you won’t need the second block object.
Hope this helps, cheers!