

Often times we receive exported files from other surveyors that we need to use in our drawings. At this time, it is great that AutoCAD Civil 3D gives us the opportunity to Create a Surface from Text Objects.
To illustrate better the task. We will look at an example where we have received a drawing with Anonymous Blocks instead of Cogo points or normal blocks. We will create a surface using those Blocks, more particularly the text that is hiding in them.
Move Text to Elevation
As previously said, we have been given a file with Anonymous Blocks. They are really hard to work with because every single one of them has a different block name. Lacks attributes and can’t be edited. We previously discussed How to Convert Anonymous Blocks *U### to Normal AutoCAD Blocks. 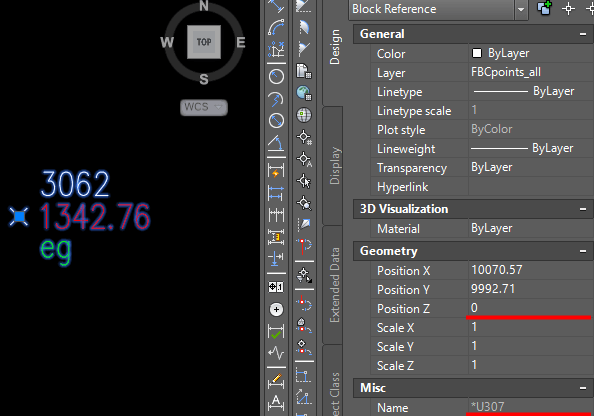
Today, however, we will isolate all the blocks and Explode them. We are not using them for Surface Creation because they lack Z coordinates.
After all the Anonymous Blocks are exploded the drawing is left with Text objects and some lines that represent the point location. Now if we select the Mtext containing the Elevation information we can see that there is no “Z” position filled in. Our first task would be to assign it to all text objects.
Don’t worry, we are not going to fill in all the elevations manually. We will use the Civil 3D Move Text to Elevation tool, to Automatically Assign Elevations to all Text objects! Please follow the steps below:
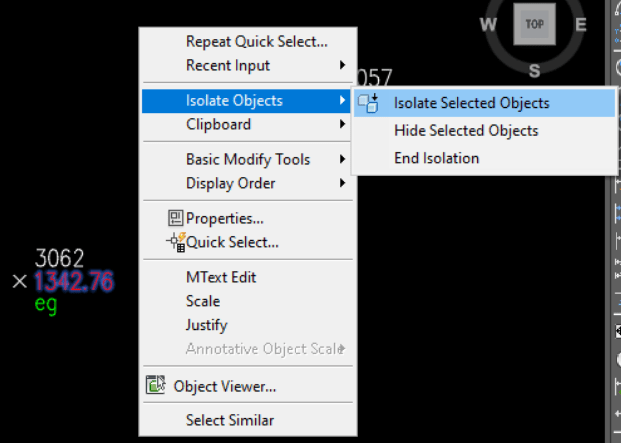
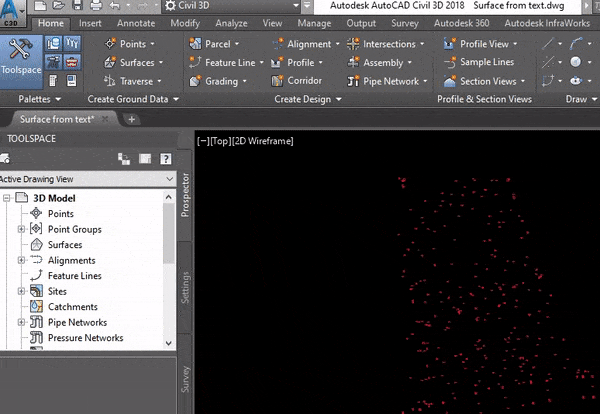
- Isolate all the Mtext objects that contain Text (in our example we will isolate using Quick Select to select all the red text, and hit Isolate Selected Objects) Check How to Quick Select objects by Color! (AutoCAD trick) for more detailed explanation.
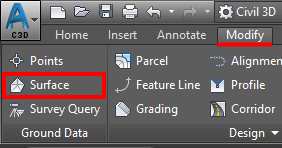
- After we are left with only Text containing Elevations we go to the Modify Ribbon tab and under Ground Data select Surface.
- A new Ribbon tab will Appear called Surface. There under Surface Tools click on the Move to Surface drop-down menu and select Move Text to Surface.
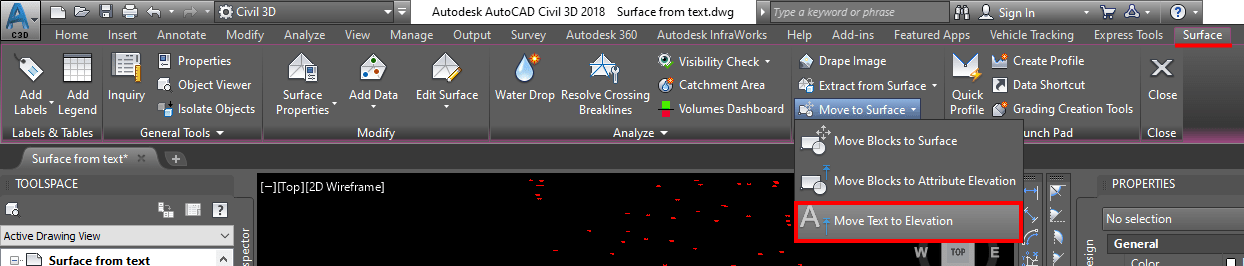
- AutoCAD will prompt to Select Text Objects: Here we select our text that contains the Elevation and hit Enter.
At this point, our Mtext objects must have their Position Z property automatically filled in.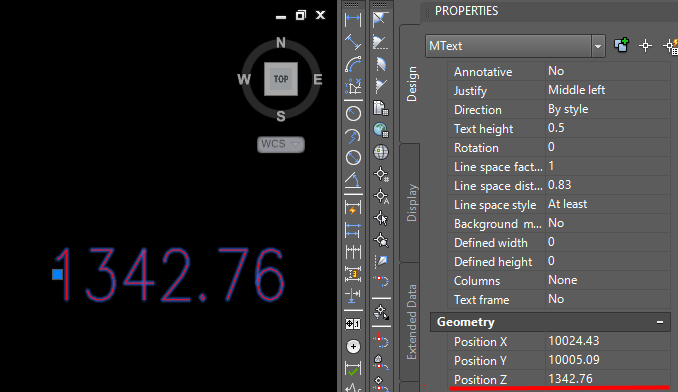
Create surface Using Text Objects.
The hard part is over. Now we just have to create a Surface using our Text objects. To do that follow the steps below:
- First, We create a TIN Surface the usual way – Home Ribbon tab > Surface drop-down menu > Create Surface > TIN Surface > Fill in the Name, Description, Style.
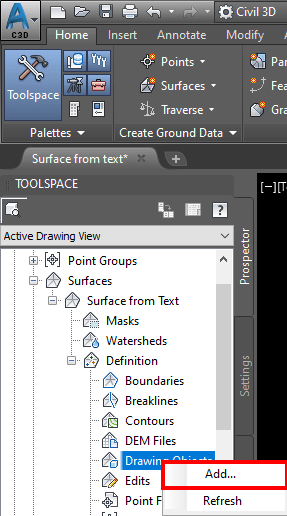
- Secondly, go to Toolspace > Surfaces > Your Surface (in the example Surface from Text) > Definition > Drawing objects > Add
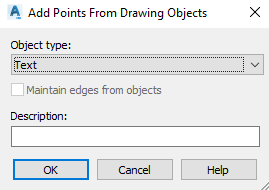
- A window will pop up, Add Points From Drawing Objects. Under Object Type: from the drop-down menu choose Text.
- Select the Objects and hit Enter!
That is it! our Surface is now ready!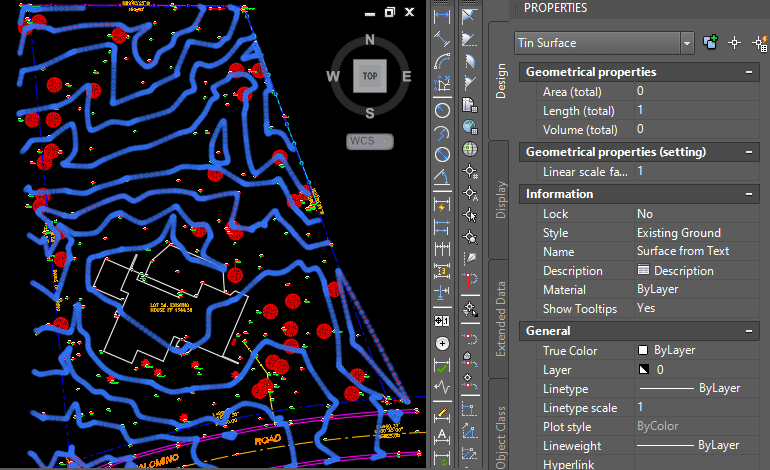
Tip: Before creating the Surface from Text it would be good to check where the Text Object Grip point is. If it is away from the actual Point Placement, you should move it to correspond with it. Otherwise the surface will be displaced with that error.
In our example I had to move the point grip of all red Text Objects.
Hope you find this post useful! You can check our other post Point Elevations From Lines or our other Civil 3d tips and Tricks!