

This post is in support of the previous post about Adding custom stations along Alignment in Civil 3D. Today we are going to look at how to set up the Alignment labels. Since the process of setting up labels in Civil 3d is almost equal for most of the objects, we will look closely how to create Major station labels, Station Equation labels and Simple Line labels for our alignment.
Setting up Major Station labels
Major stations are the basic and one of the most important Label Types in our Alignment, so we are going to look in detail how to set them up.
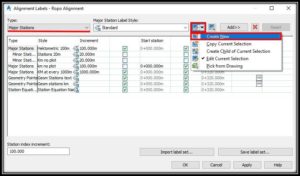
- First, we have to create a label for Major Stations that will work for us (if we don’t already have one). This can be done by entering the Alignment Labels window. Then selecting Major Station Type and creating new. (in The example I already have a label set but we will go through the process again).
- After creating the label we have to set it up. So now in the Label Set Composer window, we set up our Major station label.
- First, we type in the name in the Information tab. For Example Station 100m
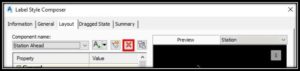
- Then we go to Layout tab and there we delete the existing properties (Text and line) by clicking on Red X.
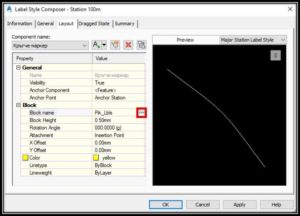
- Now we have to set our label properties. By clicking on small triangle near “A” Symbol next to the X we choose what to add. In this example, we will add 2 Text objects and one block.
- After adding block we can choose one from the drawing by clicking on 3 dots next to Block Name. After importing the block we can set up lots of setting like Visibility, Anchor component, Anchor Point, Block hight, etc.
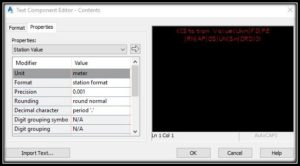
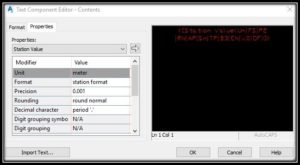
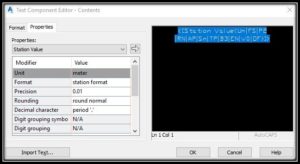
- Now we have to add Labels text. First text will be Label’s hectometre ( 0+100.00 = 10) so we go into contents by clicking on the three dots and in Text Component Editor window we type in the text from the image.
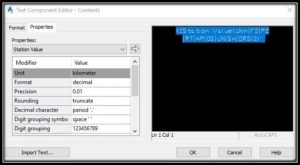
- Next label will be for the Label’s station and the text here will be this one:
That’s it we are good to go! We can add lots of different text contents for our labels, blocks, etc. So we can get creative if the design needs to.
In mine template, I have 3 different labels for Major Stations, 3 more for Station equations and so on. One for Label’s Hectometre, one for Label’s station and one for the block. This is because I want to have the opportunity to move one label without moving other with it. For example, I want to move Hectometre label away but my circle block has to stay in place.
Setting up Station Equation labels
The process of setting up Labels for Station Equations looks a lot like the previous one. Steps from 1 to 6 are exactly the same! We just have to select Station Equation Label Type.
In Step 7 the text that we have to enter in order to get our Equation’s Herctometre is this:
Step 8’s text looks like this:
Note: If you want your Custom Stations to be shown into your Profile view you have to Set up Custom Station Labels for Profile View in Civil 3D
Setting up Sample Line labels for an Alignment
This can be useful if we want to use Sample Lines for Custom stations along Alignment. Here are the steps:
- Firstly we have to place some Sample lines along our Alignment. (You can find an explanation of how to do this in the link above)
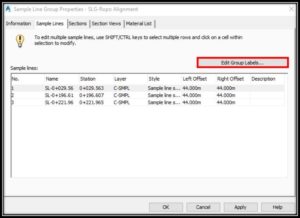
- Secondly, we have to right click on our sample lines and go to Sample Line Group Properties.
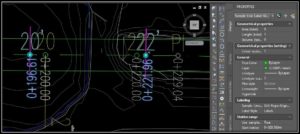
- There under Sample lines tab, we will see our sample lines. On the right side of the window, there is button Edit Group Labels.
- A window will pop up called Sample line labels and just like Alignment labels we go and create a new one.
- We choose a name for the Label Style and under Layout, we will add text and blocks, just like we did with Major Stations.
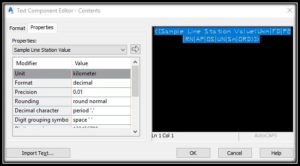
- For Hectometre text we type in this text:
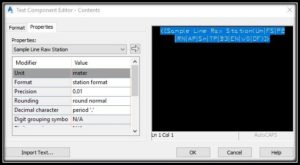
- For Label’s station text we type in this text:
That’s all we now have our Sample Line’s labels set and ready for use as custom Alignment stations!
Note: If you want your Custom Stations to be shown into your Profile view you have to Set up Custom Station Labels for Profile View in Civil 3D