After creating our first sheet set, setting a Title block for it, and adding details to our AutoCAD library, it is time to start using some of the automated functionality that it presents to us. Today we will create a sheet Index table that is fully customizable and will update at any time we change a property of our Sheet Set or a specific Sheet (Layout). This will save us a lot of time and will prevent unwanted mistakes that can occur during updating our Project.
Creating Sheet Table
We will go through all the steps needed to create a Sheet index Table
- First, we start the Sheet Set Manager (CTRL + 4) and then we open our Project.
- Now we open the Sheet (layout) where we want to place our Index Table by double-clicking on it.
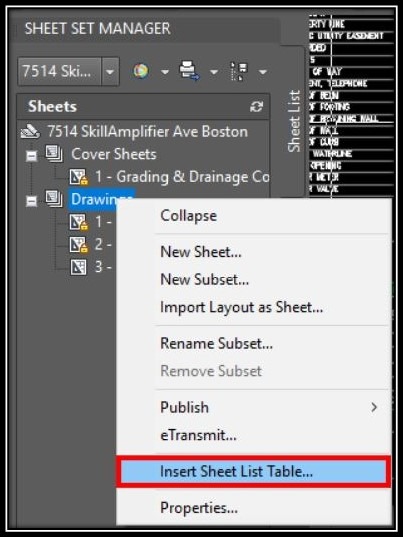
- Right-click on the Subset that needs to be placed in a table in the example we will create a table of Drawings subset. And choose Insert Sheet List Table.

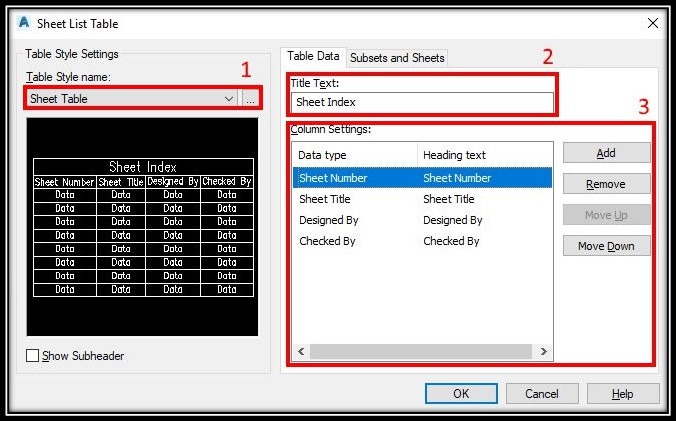
- A new window will pop up. Here we are going to set Table style and contents:
- Choosing table style that will serve our needs. You can edit your table at any time, change the text high, color, color of borders etc.
- Typing the name of the Table
- This are the columns settings, here we can add/remove and arrange our columns information. Here we can add almost every property of the sheet set and the sheets.

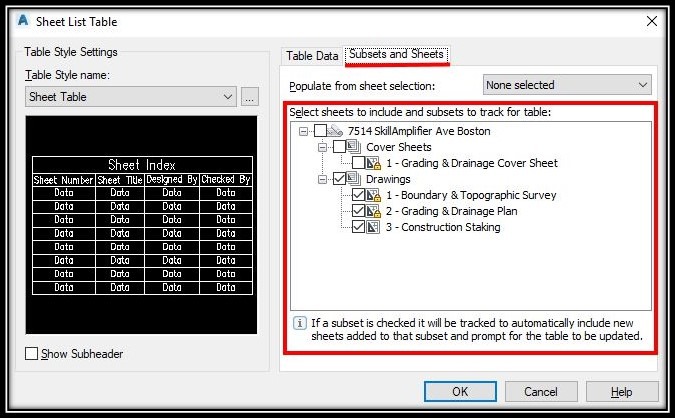
- On the next tab Subsets and Sheets, we can change the selection of sheets that will be included in the table.

- Now we hit OK and place our new table on the Sheet.
This is how the table from the example looks like:

As previously said the table is fully customizable at any given time and will update automatically! Next week we are going to plot our Entire Project with just one click of a button!
I hope you find this message a value, if you do, don’t forget to subscribe so you won’t miss any new stuff. You can also follow us on social media! Have a great day!

