
AutoCAD Sheet Sets is a great tool for managing our projects but they are not only storage and plotting utilities, they can help us manage specific details too!
In the past when people were drafting by hand it was impossible to use a drafting multiple times. Now with the help of CAD, we can do that pretty easy! Many times we have details drawn for a specific project that can be used for another. Usually, we tend to remember the names of the projects that made us spend a lot of time, however, after working for more than a year it is normal to start forgetting where we saved a specific detail. Or worse if someone else has drawn a detail that you’ve used it is almost certain that you will forget about it pretty easy.
Today we are going to take a look at how to Create a library with Details in Sheet Set, that can be used at any time!
Detail Library Creation
Creating a library is easy just follow these simple steps:
- First we Create a file that contains Details that we want to include in our Library and then Open it.
- Now we will create Views to our details, this is done by typing VIEW on the command line and then choose New…
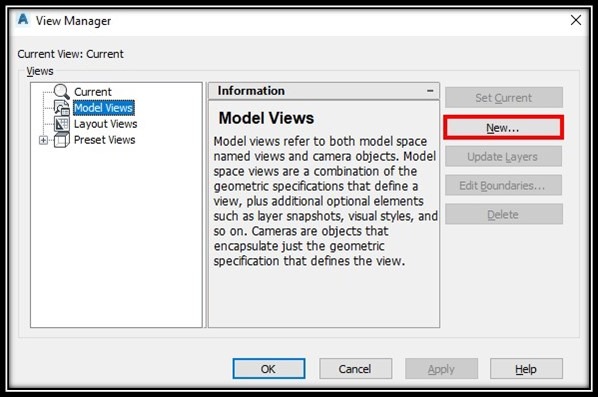
- A window will pop up, here we will define our first view. We have to fill up the info:
- Name of the View (You can choose a category if you so desire)
- Boundary of the view
- Setting up the Coordinate system (we will leave the settings as they are)
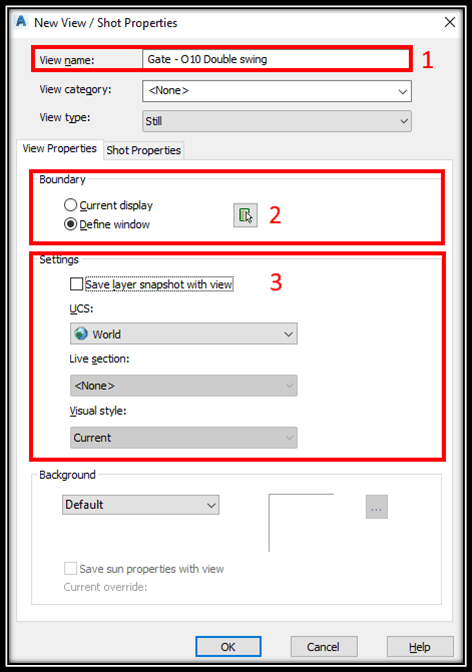
- Hit OK and the first Detail is set!
This has to be done for every detail, so it can be used in the future.
Using Details from the Library
The proccess of using already created view is pretty simple.
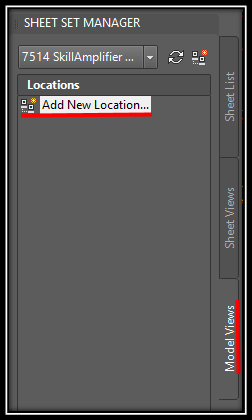
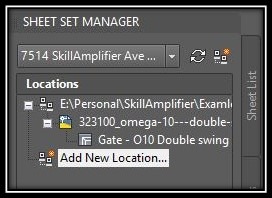
- First we start the Sheet Set Manager (CTRL + 4) and then we open our already created Sheet set.
- Go to Model Views, there we will see Add new Location… Double click on it and we choose the Folder where our Detail drawings are located.
Note: We have to choose the Folder not a specific drawing file
- Now we will see all the drawings and by expanding them we will see all the details in them. In our example there is only one drawing with only one detail – Gate – O10 Double swing
- Drag and drop the detail on the Layout, first we place it and then Right click to choose a Scale. This is really important, if we don’t choose correct scale we won’t get the desired result.

Other uses
Using Sheet sets, we can arrange our Details in the Sheet View tab. 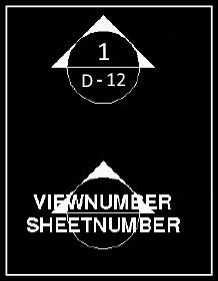 It is possible to create a Block that contains Sheet Number and View number, that way we can connect our cross sections to our details in different drawings as easy as possible!
Stay tuned for our next Sheet Set posts and more AutoCAD/Civil 3D content! Don’t forget to subscribe and follow us on Social media!