How many times have you forgotten to send a referenced drawing, .ctb file, font, or image? I personally a lot, of course after that there is an angry call from a client who can’t see the attached files or images. It is very depressing to make such a mistake, especially for young professionals.
There is a reversed problem. How many times someone has sent you a project or burned a disc with missing links between drawings or missing entire drawings, images, fonts, etc?
There is a very elegant solution to this problem – eTransmit!
Even now after so many years of AutoCAD existence, a lot of users are not aware of eTransmit. It simply is a tool that combines all files connected to your current drawing and creates an archive of them.
To easily understand How to use eTransmit, we will go through several steps:
- To start the eTransmit tool we can type on the command line ETRANSMIT, or click on AutoCAD logo > Publish > eTransmit.
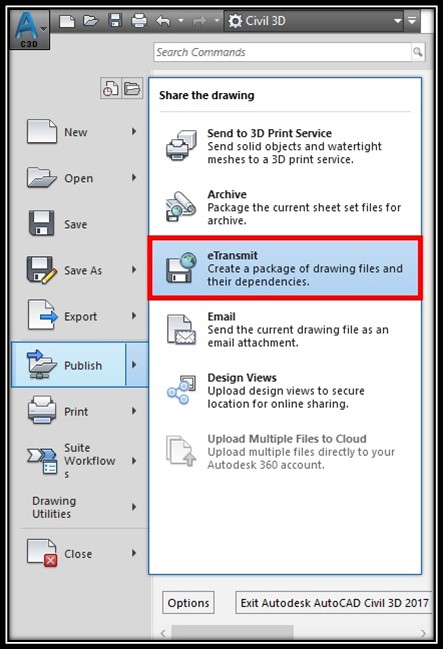
Note: Upon starting eTransmit AutoCAD will automatically ask you if you want to save your drawing before you continue. Hit ok since there could be a correction made after the last save. - A window will pop up, called eTransmit. Here we click on the Transmittal Setup to set up our options.
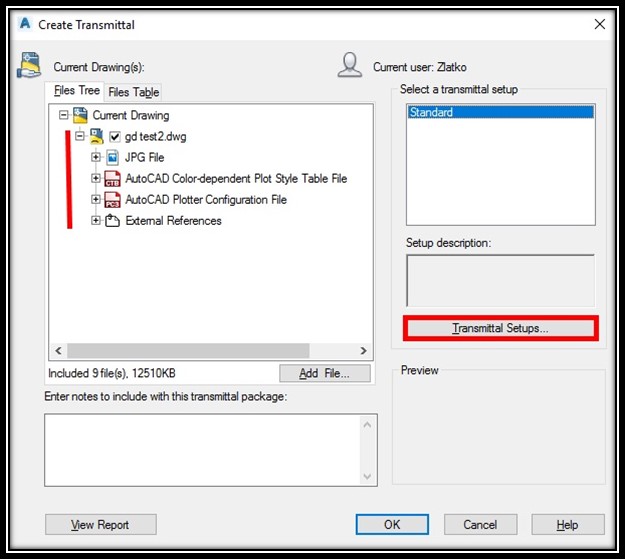
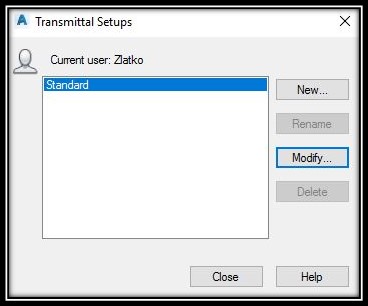
- Next, a Transmittal Setup window will pop up where we can choose either to modify the standard setup or to create a new one. In the example, we will click Modify to modify the existing “standard” setup.
- On the next window, called Modify Transmittal Setup. We will see that AutoCAD provides a lot of different options concerning our package.

1. Transmittal type and location
– First, we pick the package type – we can choose from either .zip file or a folder, I personally prefer the .zip file for my transmittals.
– Second is the drawing File format. Here we can choose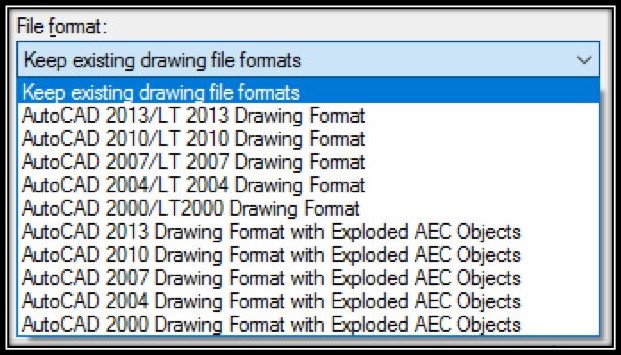 a different (older) version of AutoCAD files. However, it is better to stick with the current version unless we have specific requirements. We can also pick a drawing format with exploded AEC Objects. For example, if we are using Civil 3d our profiles, alignments, etc. will be exploded into simple AutoCAD objects like polylines, lines, arcs, etc.
– Next, we would like to leave the box of visual fidelity checked because if we uncheck it could harm our annotative objects (if we have any)
– The transmittal file folder is our output folder.
– Transmittal file name – here we can set a predefined name for our package. For now, we will leave it as it is because we want AutoCAD to ask us every time for a name.
2. Path Options – Here we are choosing our folder organization. If we want to be sure that our path won’t be broken we can choose “Place all files in one folder”. (Xref – choosing our Path Type)
3. Actions – here are some different actions that AutoCAD can automatically complete for us. I find interesting, the “Bind external references” option, since some Cad users are not familiar with the external references. This is why sometimes binding those in the master file can be a good idea.
4. Include options – Here we can choose what to include in our package – a good practice is to check all boxes.
Another option can be to “Include unloaded file references”.
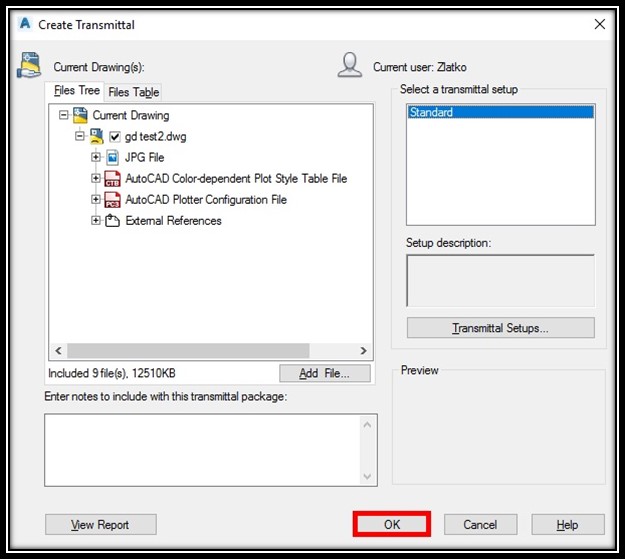
Then hit OK to complete the eTransmit package. - On the Create Transmittal window, we hit OK again
Then, AutoCAD will ask us to type in the name of the Transmittal. After filling it in, we hit Save.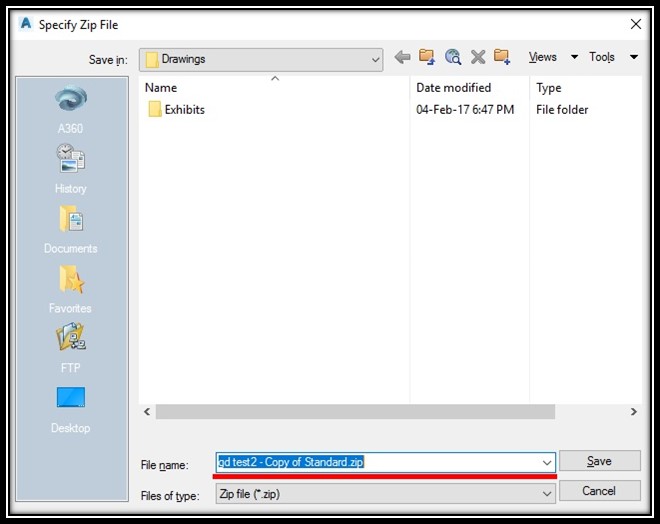
Here is our .zip Package ready to be sent away!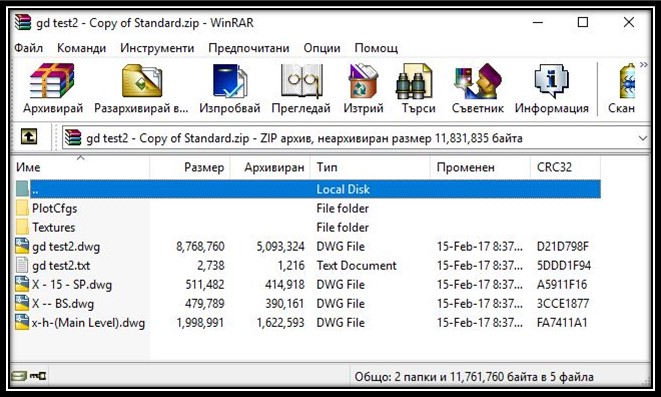
Hope you find this post a value, you can check our other AutoCAD Articles to find even more interesting tips and tricks.
And don’t forget to share this page with your friends and colleagues.

