Oftentimes, when using AutoCAD, in collaboration with other software we need to export parts of a drawing to DXF. That is because not every software can read the information from a dwg file.
Also, it would be a nightmare to navigate through the whole drawing with its hundreds and thousands of objects.
This is why it is really important to know how to Export Objects to DXF in AutoCAD. We will go through the process in 5 Simple and Easy to follow steps.
- In the Drawing from which you are going to Export Object to DXF, go to the File Menu and click Save As
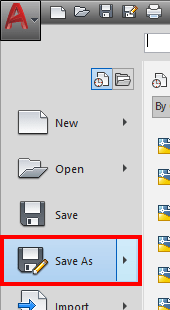
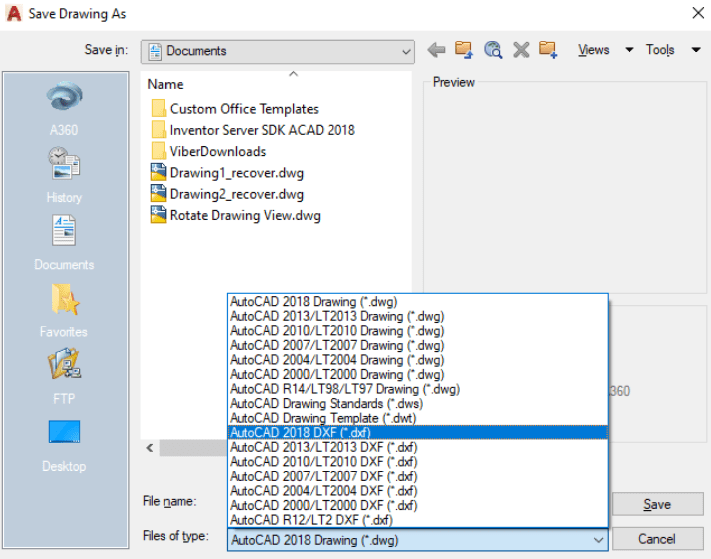
- A window will pop out called Save Drawing As there,
- Under File Name: Specify the name of the DXF file
- Under Files of Type: Select AutoCAD XXXX DXF (.dxf)
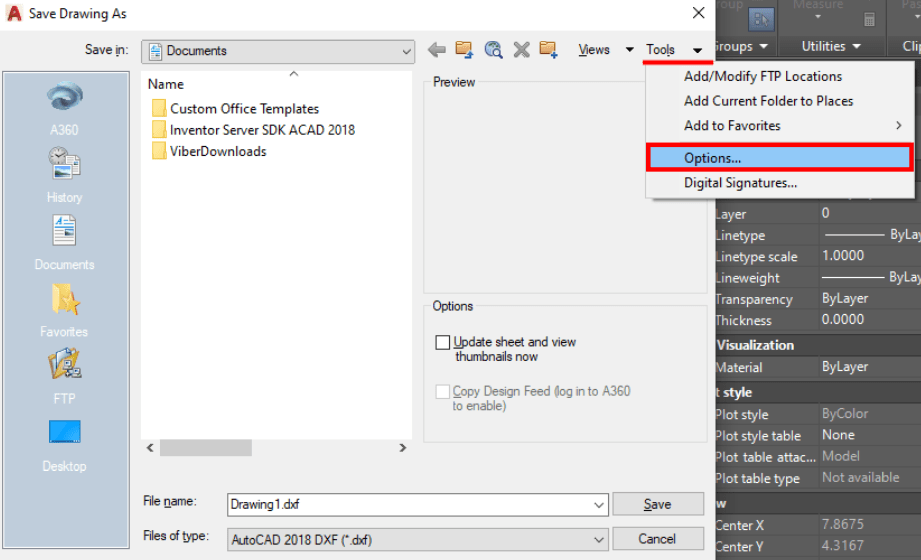
- Then click on Tools and then Options.
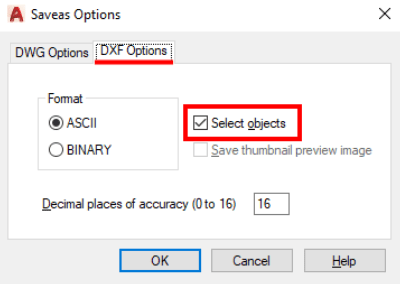
- A new window will pop out, this time it is called SaveAs Options, there under DXF Options tab, choose Select Objects and hit OK
- On Save Drawings As window, click on Save
- Then, AutoCAD will ask you to Select Objects to Export to DXF. Now, select the objects and hit Enter.
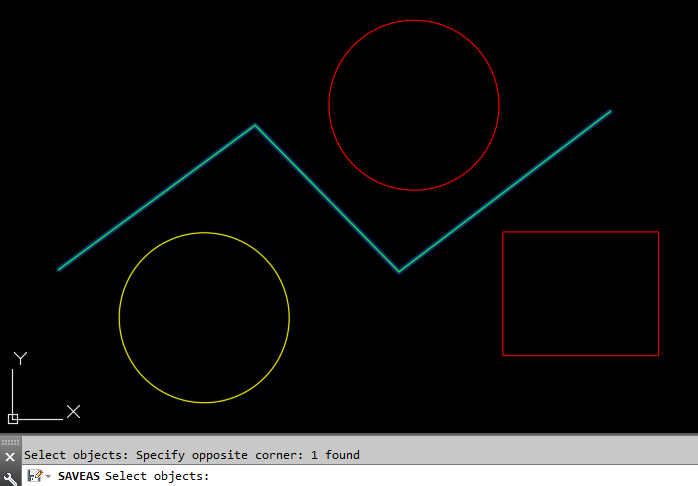
That was it, you now have a .DXF file with the objects you selected and can use it as you please.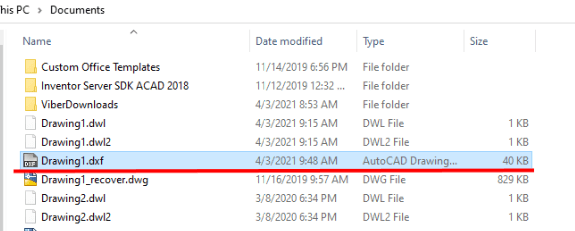
Hope you find the advice useful!
Don’t forget to check out our other AutoCAD Tips and Share the post with your Colleagues!

