

Have you ever heard of Center Mark and Centerline tools? These are great features introduced in the AutoCAD 2017 version.
With the help of Center Mark, you can now add an interactive object to both Circles and Arcs, that represents the center of the circle with just one click of the mouse.
The centerline tool, as the name suggests, adds a line in the geometric middle of two previously selected lines.
Today, we will take a closer look at these AutoCAD tools and will find out how to leverage their benefits in the best way possible.
Add a Center Mark in AutoCAD
We will start with the Center Mark tool as it quickly grew to one of my favorite productivity tricks while drawing.
To add a Center Mark to a Circle or an Arc, go to Annotate ribbon tab, there under Centerlines, you will see the Center Mark icon. Click on the icon and then click on the circle or arc. Then just hit Enter to exit the command.![]()
When firstly added, the Center mark will span the whole diameter of the circle. Fortunately, it is dynamic, and changing the circle’s diameter will change the Mark automatically. When you change the radius/diameter of the circle Center mark will adjust its size. You can also change the size of the extensions by using the Grips or Properties palette.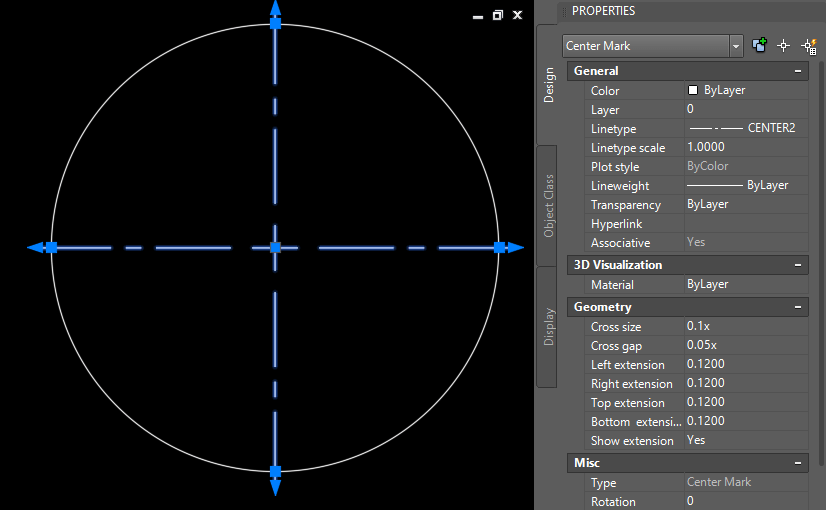
From the properties palette, you can also change some other interesting features like:
- Change the linetype and color of the Center Mark Extensions.
- Size of the Center Cross.
- The gap between the Center Cross and the Extensions.
- The Size of each Individual Extension.
- Rotation of the Mark
Add a Centerline in AutoCAD
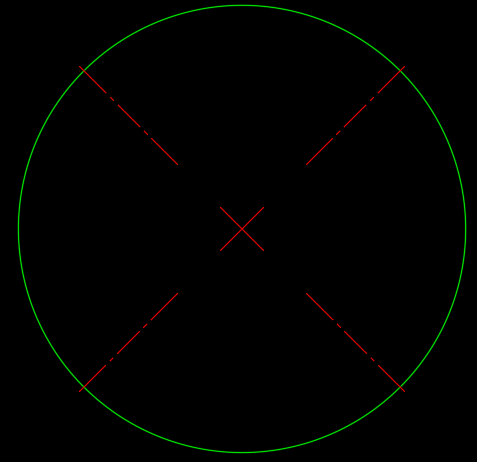
Secondly, we will take a look at the Centerline tool. To add a Centerline between two other lines, go to the Annotate Ribbon Tab, then under Centerlines, you will find the Centerline Icon. Click on it and then select the two lines between which a centerline needs to be added. Hit Enter to exit the command. ![]()
The two lines which we will select don’t have to be parallel, the Centerline will be automatically added to non-parallel lines too! When a Centerline is added between two lines, it will be dynamically linked to them. This means that when changing one of the two lines, the Centerline will adjust so it is in the center of the two again!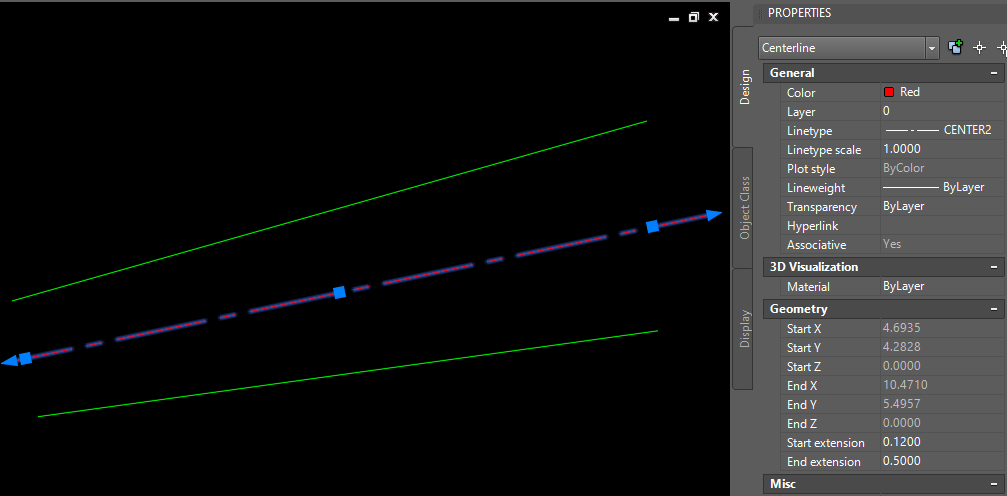
From the properties palette, you can also change some interesting features like:
- Color, Layer,linetype and Linetype scale of the Centerline.
- Start and End extensions
For further editing of Centerlines, you can type CHPROP on the command line and then select the Centerline you will edit. AutoCAD will prompt to Enter property to change [Color/LAyer/LType/ltScale/LWeight/Thickness/TRansparency/Material/Annotative]:
Hope you find the trick useful!
Don’t forget to check out our other AutoCAD Tips and Share the post with your Colleagues!