

Checking the area of a closed object, a polygon is a common practice when working with AutoCAD. We all know the AREA command that displays the area in the command line. Previously we have even looked at a way to get automatically a summarized areas of several objects.
The issue with these practices is that when the polyline or the object is revised, the label text remains unchanged. This leads to a lot of issues if not taken care of in time.
That Is why, today we are going to look at, how to create an AutoCAD area leader that Dynamically changes when the source object gets changed.
How to create automatic Area Label in AutoCAD
To create a dynamic label/leader we will use AutoCAD text Fields. To learn how, follow the steps below:
- Firstly, create your MLEADER and fill in a constant text for prefix or suffix. For example: Area: …….. s.f.
- Secondly, right click on the text area where the area number will be shown and choose Insert Field.
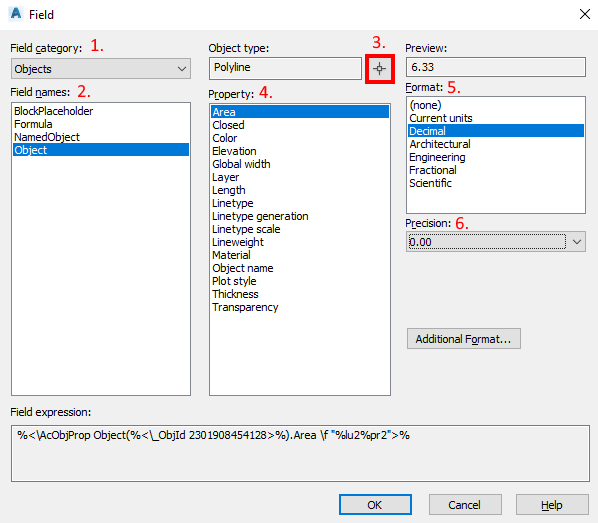
- Now, a window called Field will pop-up here we set the desired properties for the automatic text.
- Under Field Category choose Objects that way we will find the wanted field easier.
- Field Name should be also Object.
- To Choose the Specific Object for which the Automatic Area Label will be created, Click on Select Object button at the middle top of the window.
AutoCAD will bring you back to the Model Space so you can select the desired object using the mouse. - After going back to the Field window, for desired Property select Area as this what we want to use.
- The Format depends on your personal preference, in the example we have chosen Decimal.
- Under Format, you will see Precision, there you set the precision for the area text.
- After setting up the Field, hit OK. The Automatic Area Label is created!
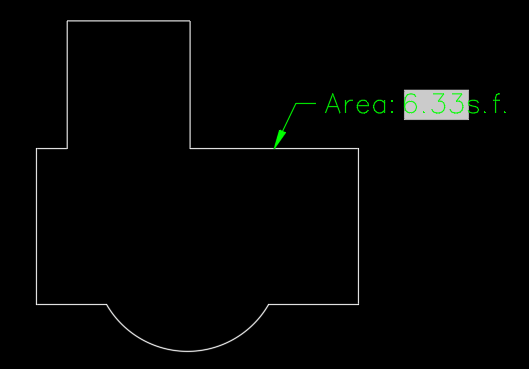
Note: The field text will be displayed with a grey background fill. Don’t worry, the filling won’t be plotted it is just there as a reference for the Field Text.
If you really don’t like to see it, go to Options then under User Preferences, under Fields, uncheck Display background of fields.
If you found this information useful. Don’t forget to check our other AutoCAD Tips for more great Tips and Tricks just like this one!