You have a clean set of contours and a sheet due. Every index contour needs its elevation on it, the number has to sit on the line, follow the direction of the line, and still read the right way up. It is not hard work, but it is slow, repetitive work, and it is easy to get one label wrong.
The manual way, and where it goes wrong
In plain AutoCAD the usual routine is: create some text, type the elevation (or read it from the Properties palette first), rotate the text to match the contour, move it onto the line, and then deal with the contour running through the number, either with a mask or by trimming the line. Then repeat for the next contour.
Each label is four or five small actions, and each action is a chance for a typo, a label that is upside down, or text that is a few units off the line. It also means that the number on the plan is whatever you typed, not what the contour actually holds.
What CTT does instead
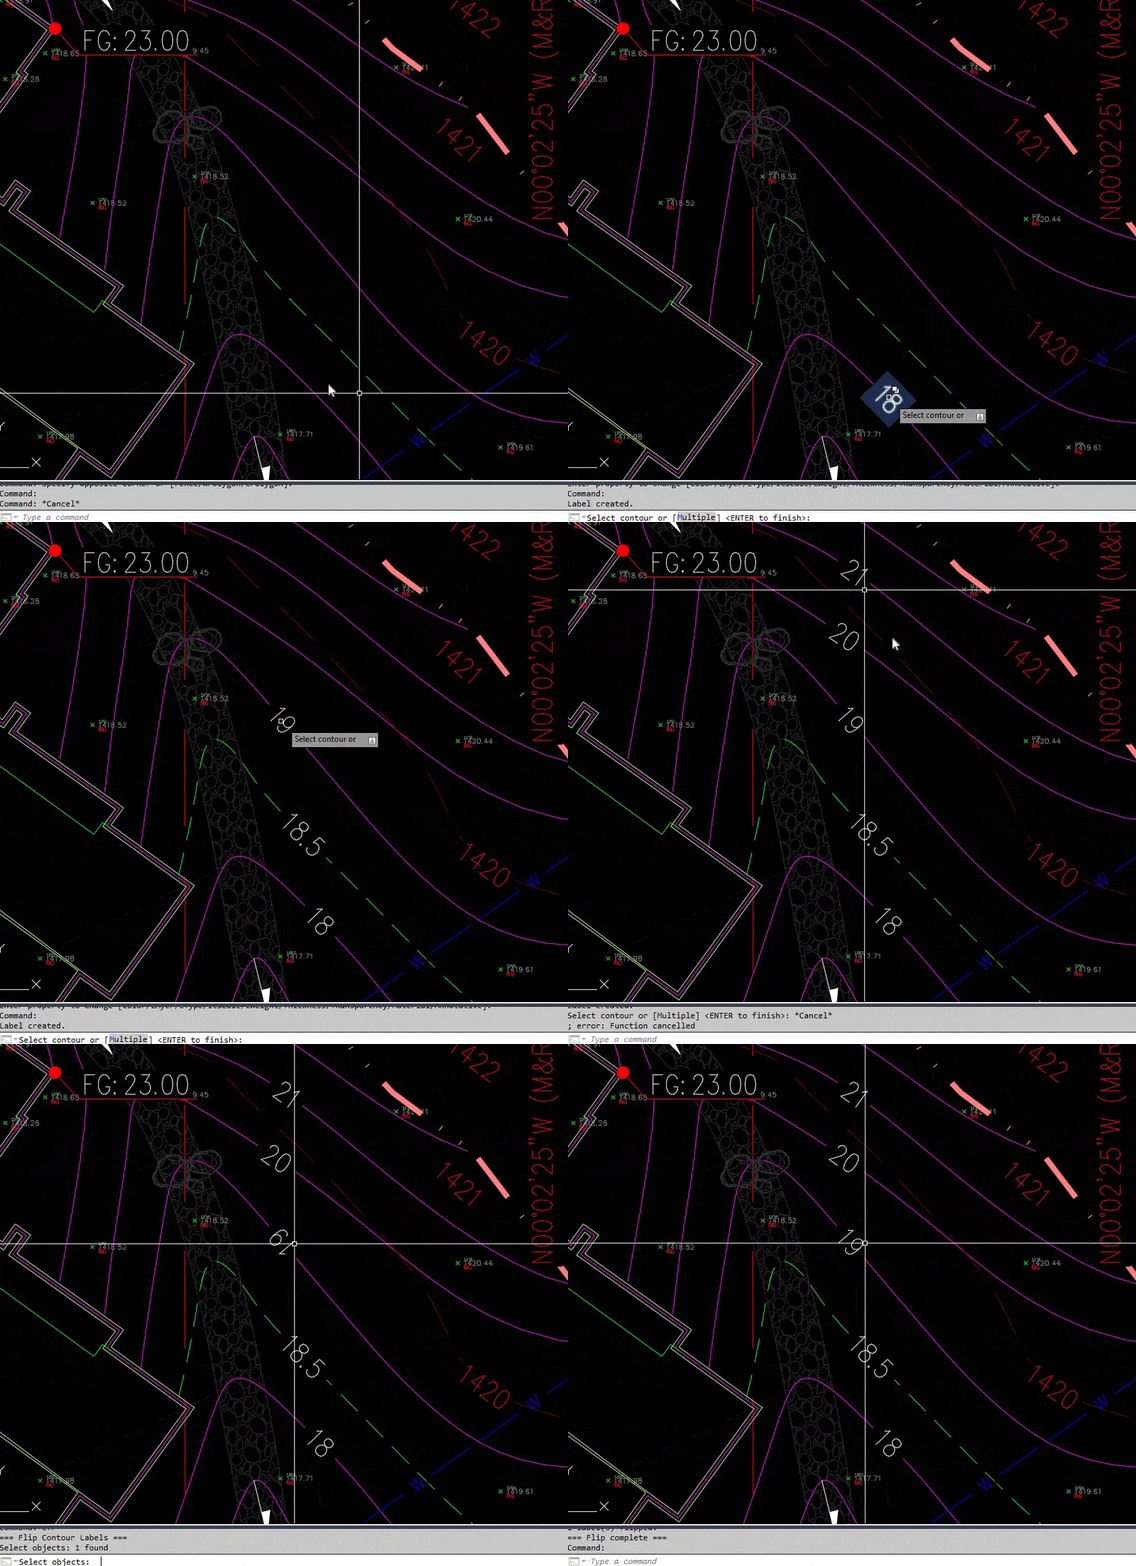
CTT is in TerraDraft Lite. You click a contour, and the command finds the closest point on that contour to your click, reads the elevation (the Z value) at that point, and creates an MTEXT label right there.
The label is rotated to follow the contour direction at that point, and flipped when needed so it is never upside down. The background mask is switched on, so the contour does not run through the number. The text uses your current layer and current text style. The height comes from the text style; if the style height is 0, it uses the TEXTSIZE setting instead. The elevation is written with two decimals, for example 1400.05.
Step by step
- Set the layer and text style you want the labels to use. CTT does not choose them for you, it takes whatever is current.
- Type CTT and press Enter. The command line says: Click on contour polylines to place labels. Press ENTER when done.
- At the prompt Select contour : click the contour where you want the label.
- The label appears and the same prompt returns. Click the next contour, and the next.
- Press Enter to finish.
If you click something that has no curve geometry, you get Not a valid contour object - try again. and the prompt stays active. CTT works on polylines (LWPOLYLINE, 2D and 3D, splined polylines), splines and lines.

Tips and common mistakes
- The label shows the contour’s real elevation. It is read from the Z of the clicked point. A contour that was drawn flat at elevation 0 will be labelled
0. Give the contours their elevations first, for example with the ACE command. - The label is static. If you change the contour’s elevation afterwards, the label does not follow. Delete it and place it again.
- Precision depending. Precision depends on the object’s elevation. There is no prefix, suffix or decimals setting in Lite.
- Text is annotative. The height is the text style height, so set the style for your plot scale before you label.
- Where you click is where it goes. The label is placed at the closest point to your click, so click on a calm stretch of the contour, away from neighbouring lines.
Lite and Pro
This post describes the Lite version of CTT, which places static labels. TerraDraft Pro keeps the same command name but makes the label dynamic: it is linked to its contour and updates when the contour is edited (see dynamic contour labels). Pro also adds a Multiple mode, HW and BOT labels, and prefix and suffix settings. If you already have text on the drawing instead of elevations on the contours, CONTELTXT in Pro assigns them for you. Only one edition should be installed at a time.
Try it
TerraDraft Lite is free: download TerraDraft Lite. It runs on Windows in full AutoCAD (not LT), and it was built and tested on AutoCAD 2025. If you want labels that stay linked to the contours, have a look at TerraDraft Pro.
Try it on your own drawing
TerraDraft Lite is free to download.