Mastering AutoCAD Blocks is essential for architects, engineers, and designers who want to work efficiently and effectively. In this blog post, we’ll focus on two powerful techniques for working with blocks: How to use a Temporary Insertion Point and How to Add Multiple Insertion Points to a Block. These two skills are a continuation of our earlier post on How to Change Blocks Insertion Point in AutoCAD
By using a temporary insertion point, you can quickly and easily specify exactly where you want to place a block in your drawing. While adding multiple base points to Block definition can give you even more flexibility and control when working with blocks. In the rest of this blog post, we’ll walk you through the steps for using both techniques, as well as provide some additional tips and best practices for working with blocks in AutoCAD. Read on to learn how to master this powerful tool!
Use Temporary Insertion Point for Block in AutoCAD
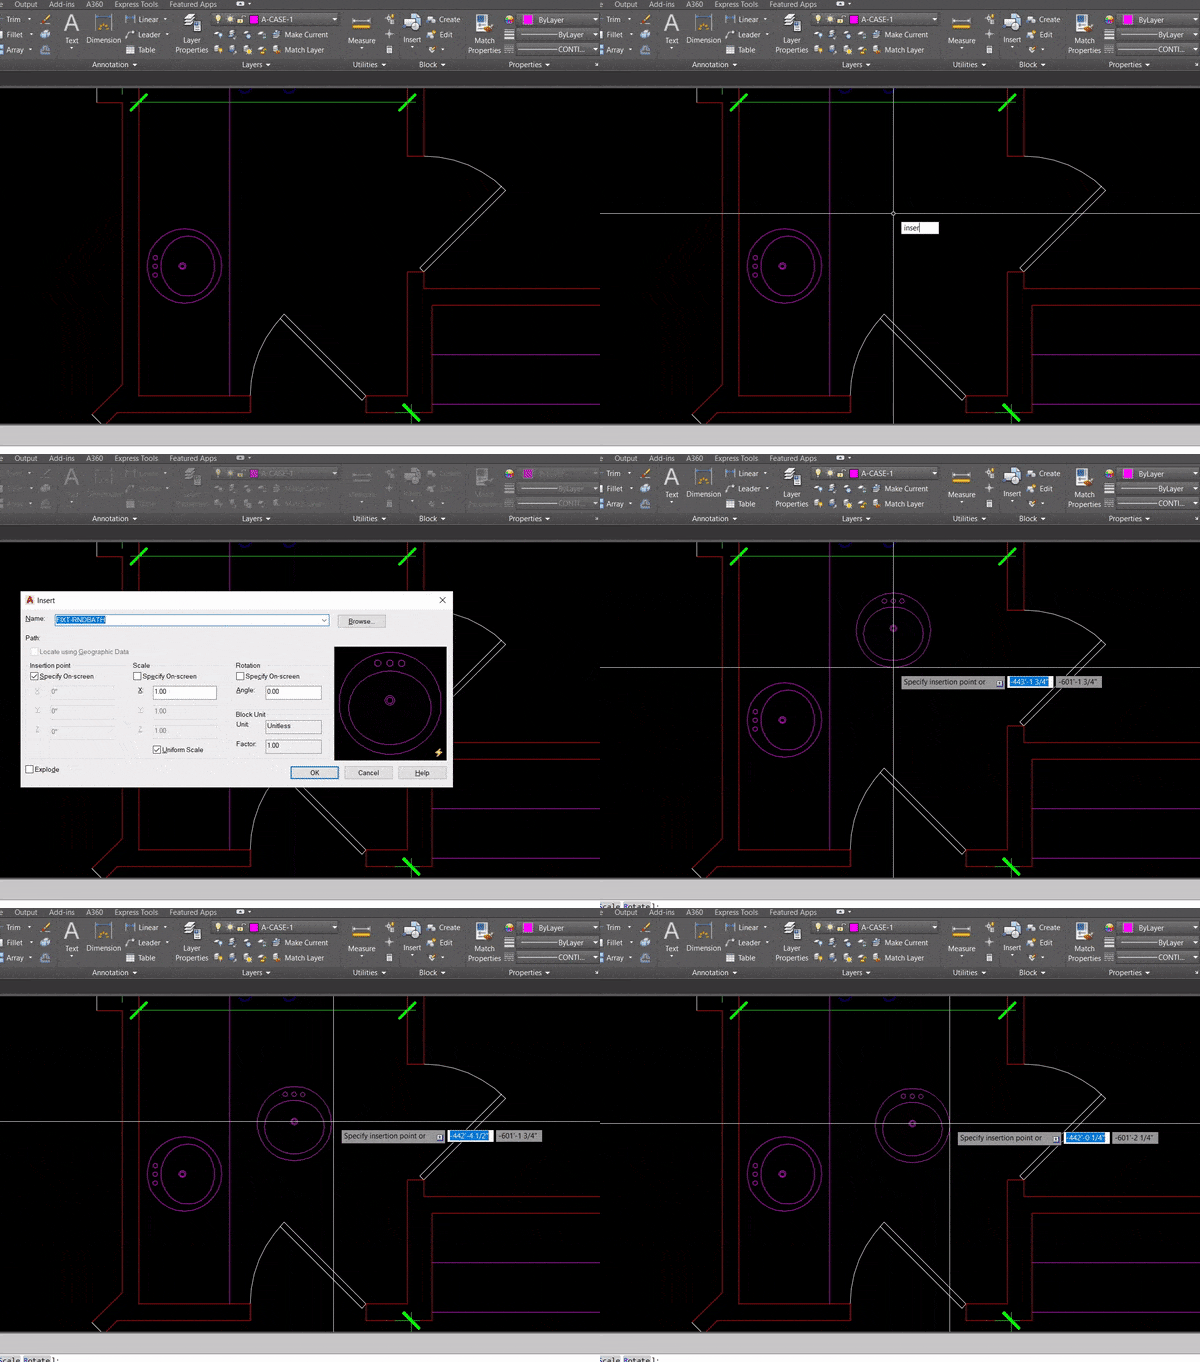
Usually, all Block objects have a specific Base Point which is used when inserting them into the drawing. However, AutoCAD gives us the option to choose a Custom Insertion Point. This can be quite useful on many occasions! To learn the trick, follow the steps below:
- Type on the command line INSERT to insert the Block into the drawing.
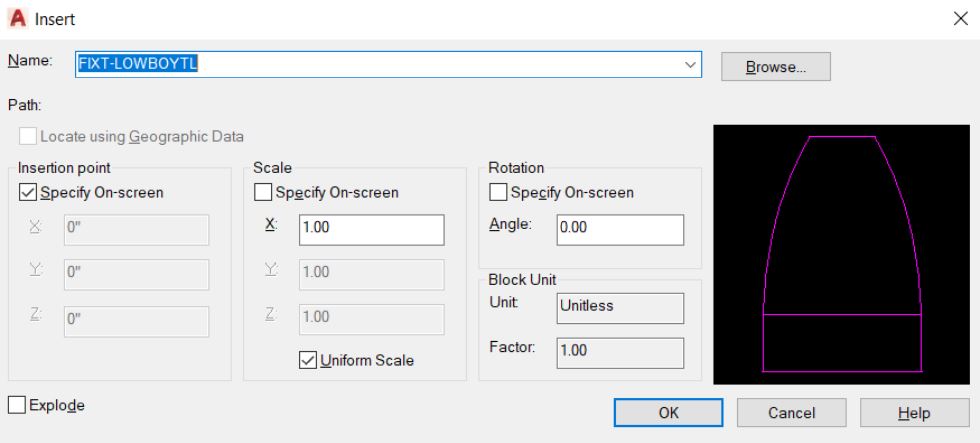
- Choose the Block from the List. (or type in Block’s name) and check the Specify on-screen option under Insertion Point and hit OK.
- Next, AutoCAD will prompt you to Specify insertion point or [Basepoint/Scale/Rotate]: type B or select the Basepoint option.
- Then it will ask to Specify base point: now select a temporary base point.
- Lastly, select where to insert the block.
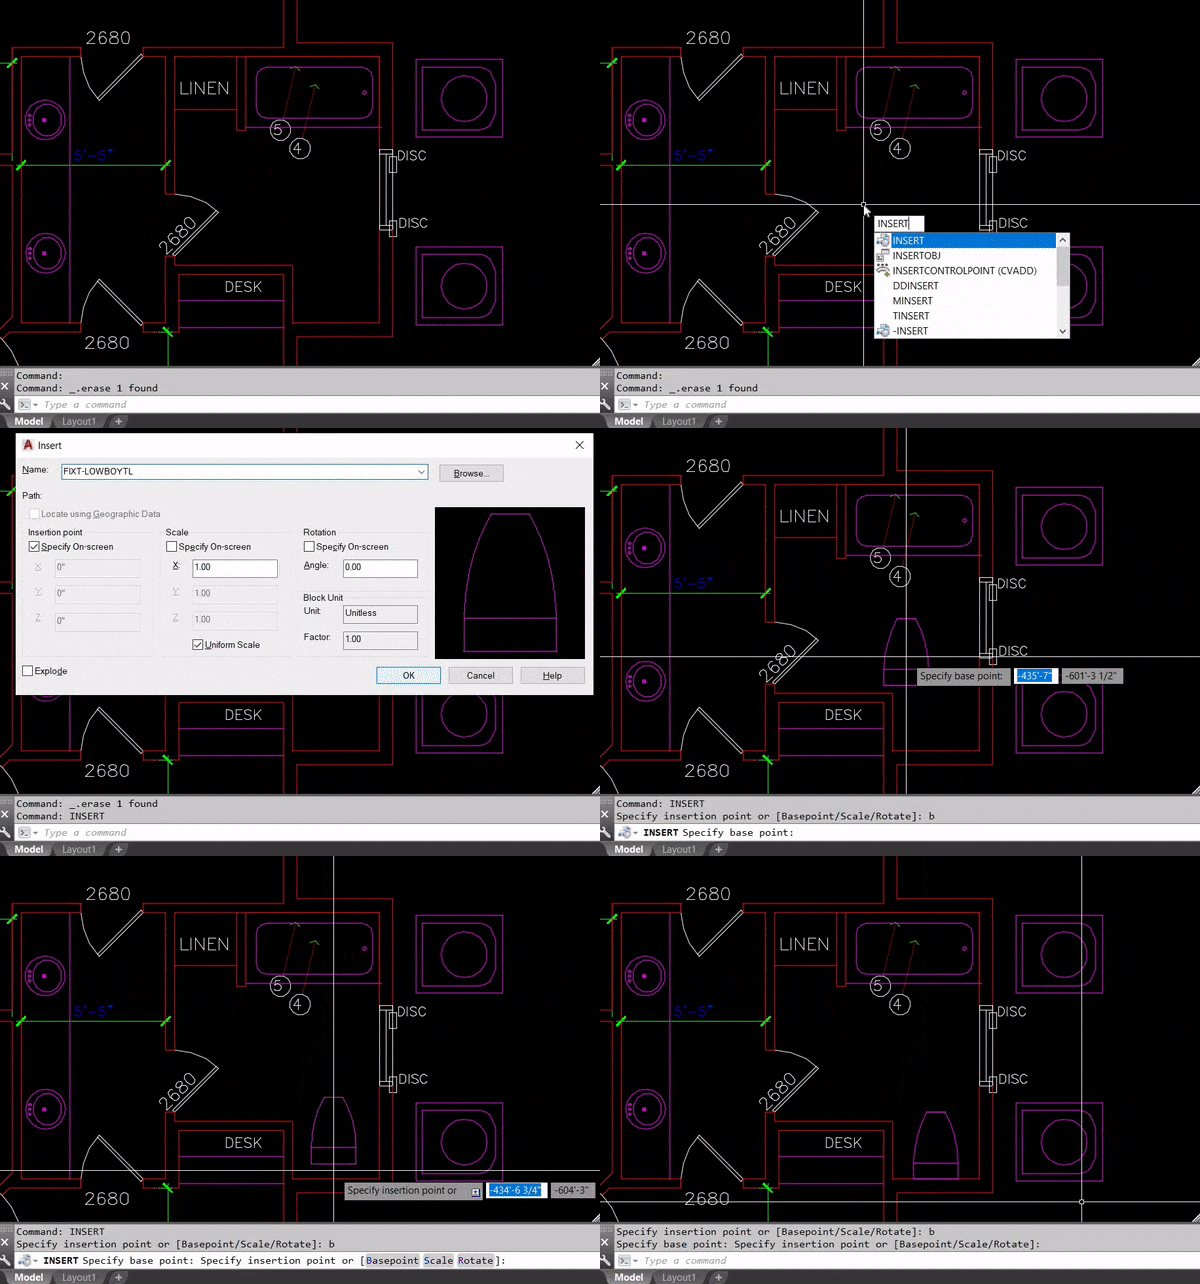
This is it, using this smart trick, you will become much more efficient in your work and save vital time.
Note: On step 3, in addition to the temporary Basepoint, you can select to Rotate or Scale the block before inserting it into the drawing!
Add Multiple Base Points to Block
Adding multiple base points to Block is a great trick, that dramatically improves drafting time by streamlining the repetitive task of adding a temporary insertion point to block or moving it afterward. To learn how to use it, follow the steps below:
- First, Right-click on the Block and select Block Editor. (Or type on the command line BE)
- Secondly, when in the block editor, select Point from the Action Parameters tab.

- Then, AutoCAD will prompt to Specify parameter location or [Name/Label/Chain/Description/Palette]: Select where the new base point will need to be. ( you can add multiple Point Parameters)
- Lastly, Close the Block Editor, and don’t forget to Save Changes.
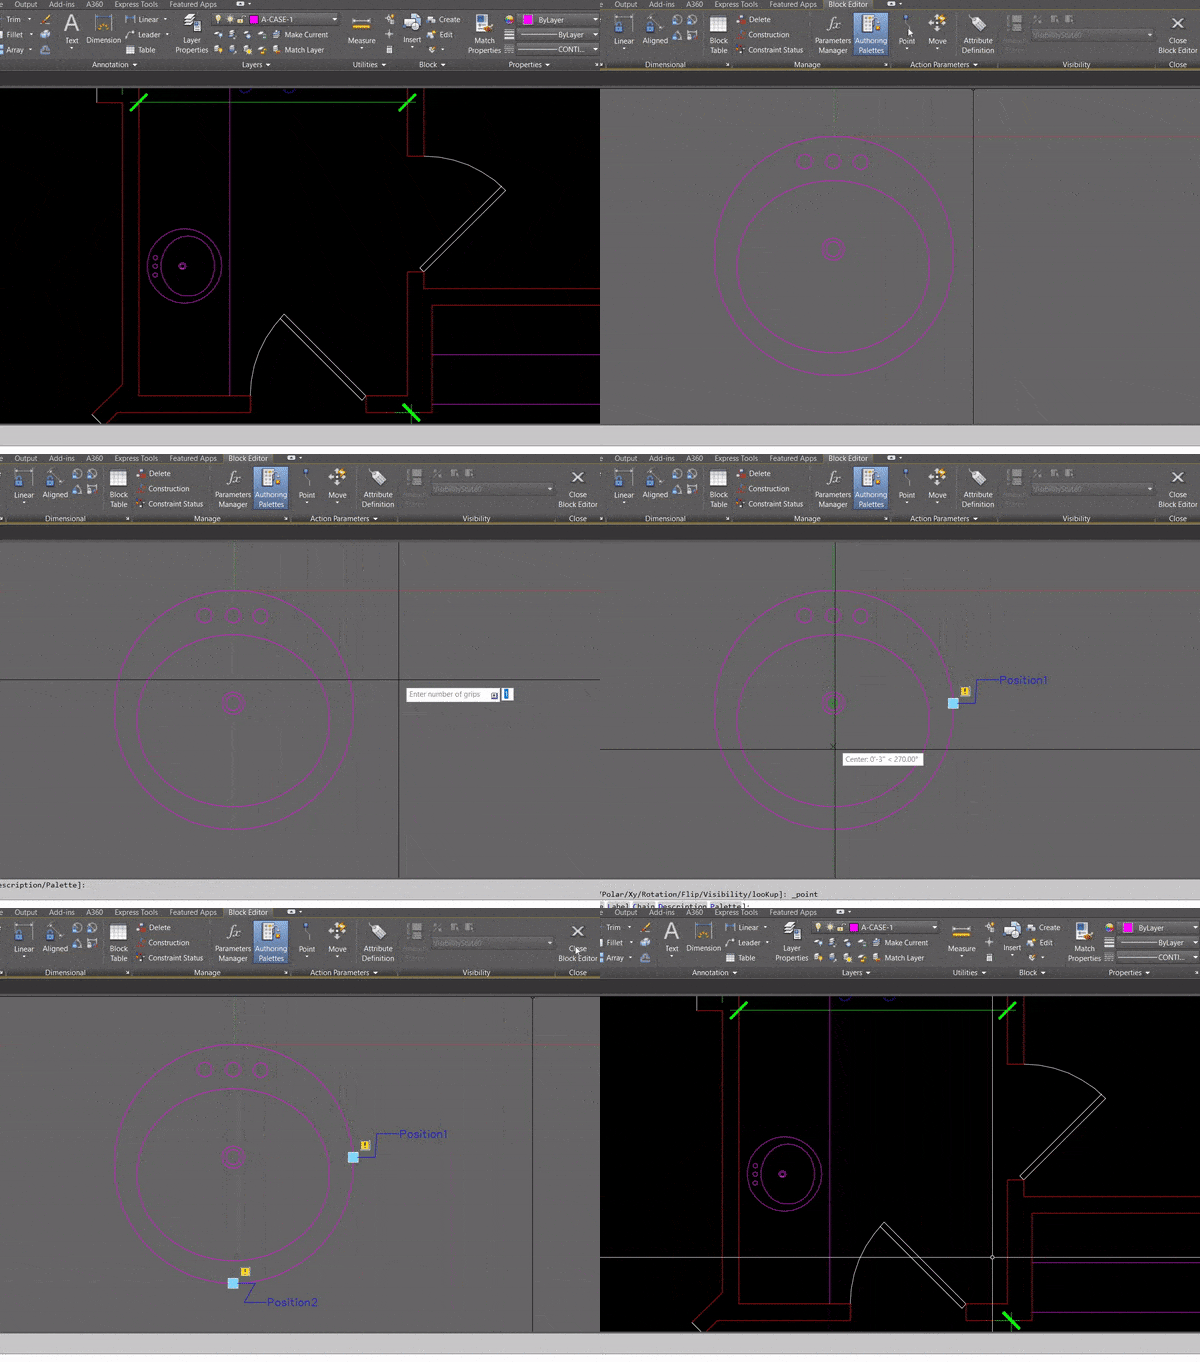
Note: Usually, action parameters are used to create Dynamic Blocks and you need to apply an Action to the specific parameter. In this case, though, we don’t need a specific action to add additional base points to the block.
After Updating the Block definition, use the CTRL key when inserting it, to toggle between the different base points.
By adding smart tools like using a Temporary Insertion point for Blocks or Adding Extra Base points to frequently used blocks in your daily drafting you will become more efficient and productive in your work. Experiment with these techniques and integrate them into your workflow to get the most out of AutoCAD.
Hope you find this post a value, you can check our other AutoCAD Articles to find even more interesting tips and tricks.

