We have already discussed, how to create Alignment Stations Through COGO Points! (Civil 3D Stations On COGO POINT!). Today we will continue the theme by setting up a Profile View to match Stations placed through COGO Points.
We will continue with the previous example and set a Profile View through COGO Points.
- Create Surface Profile from Home Ribbon > Create Design tab > Profile > Create Surface Profile.
- After Creating the Profile, Hit Draw in Profile View.
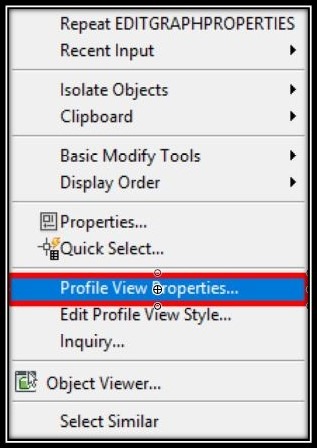
- Now we have our Profile view drawn it is time to Set our Custom Profile Bands. Right-click on the Profile View and hit Profile View Properties…

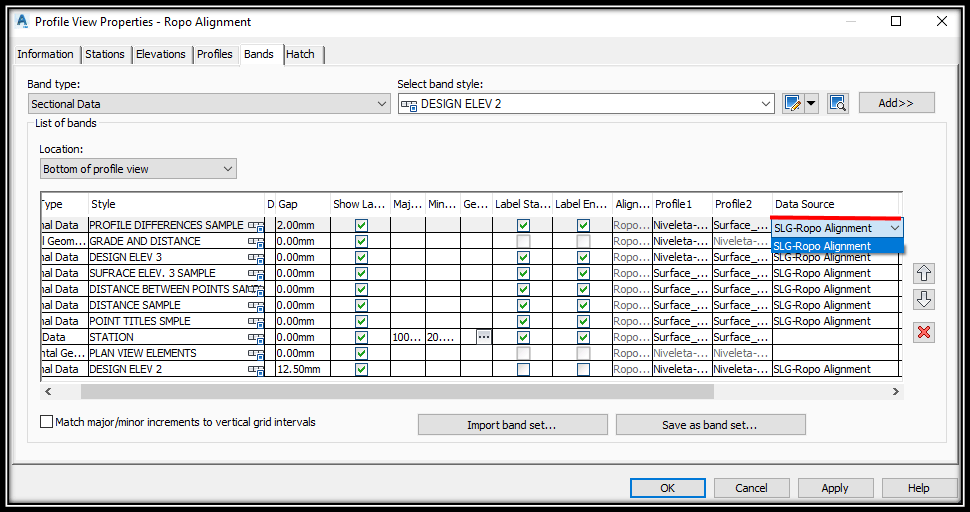
- A window will pop up, now go to Bands Tab, under Band Type, choose Sectional Data and hit Copy Current Selection.

- Now is the time to Set Up Custom Station Labels for Profile View in Civil 3D for our Sectional Data.
- After Setting the Bands, we go back to Profile View Properties > Bands and search for Data Source Row. There from the drop-down menu, we choose our Sample line group. Then hit OK.

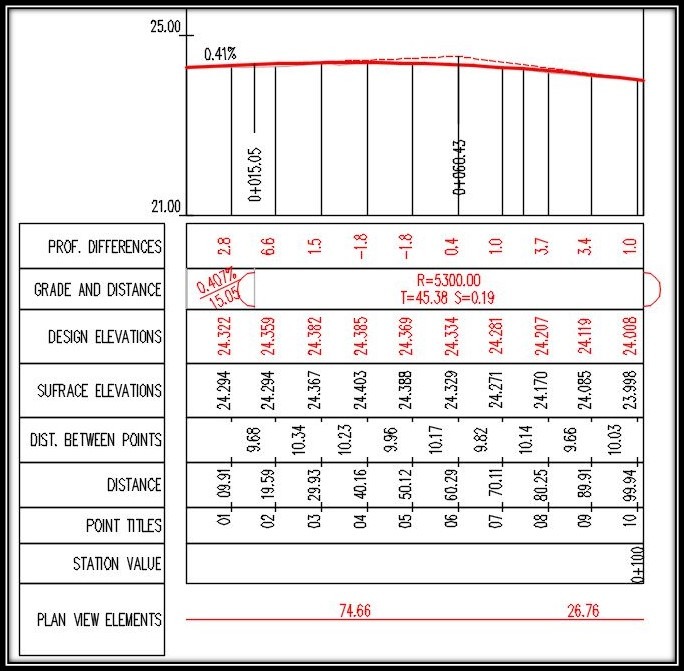
- At this point, we will have our Bands set and they will correspond with the Sample Line Stations, The last thing to do is to turn on The Grid lines for Sample Lines. To do that Right Click on Profile View and go to the Profile View Style.
- Under Display tab, find Grid at Sample Line Stations. Click on the bulb to Turn it ON. If you want you can Turn Off the Grid Lines at Vertical Major/Minor stations. Hit OK!

That is all! Now you can have Profile View Bands through COGO Points!
We have many other AutoCAD related Topics! that will help you become one of the best designers in your company!

