In Excel, the paste as transpose is extremely useful for transposing a column to a row or vice versa. But if there are formulas in the cells, the reference will change and mess up our desired values.
In this post, we will show you, two easy methods on how to paste as transpose and keep formula/value references.
In the first method, we are going to Paste as transpose and keep formula references using Find and Replace functionality.
When using the second method we will Paste transpose and keep the values referenced from the original cells.
How to transpose excel data and keep reference in using Find And Replace!
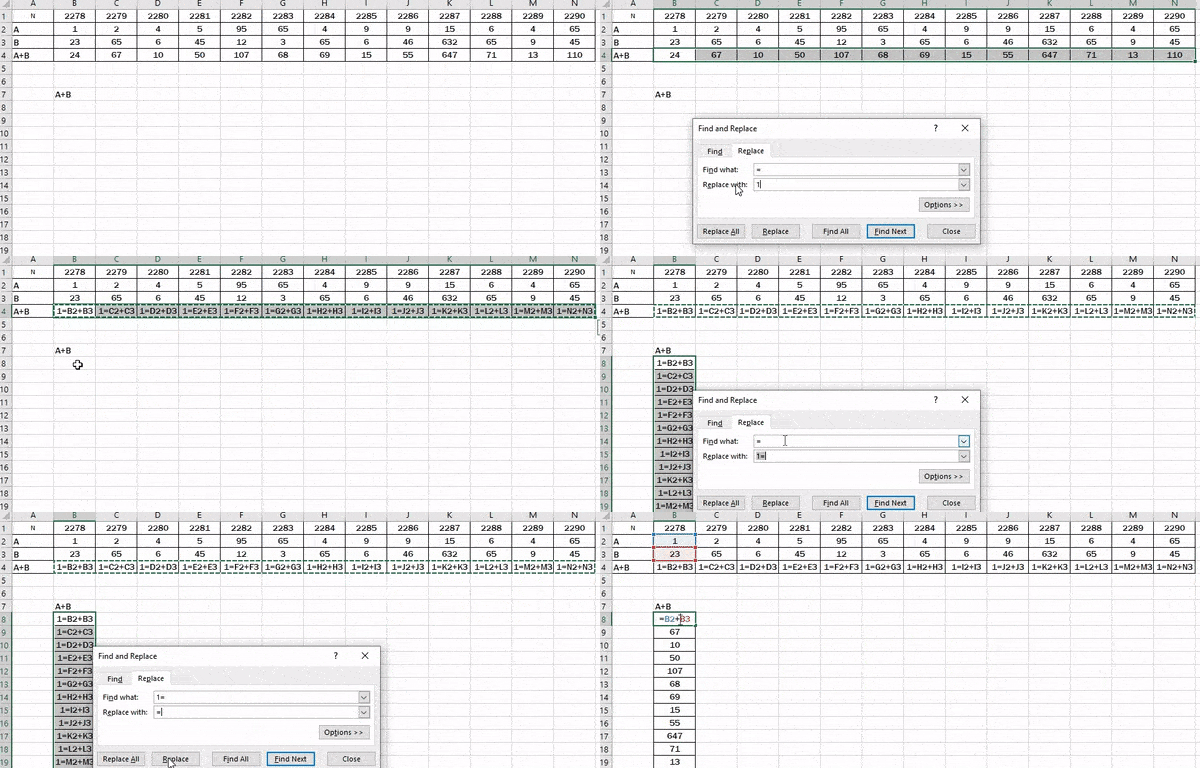
To transpose and keep formula references in Excel just follow these 5 Simple Steps:
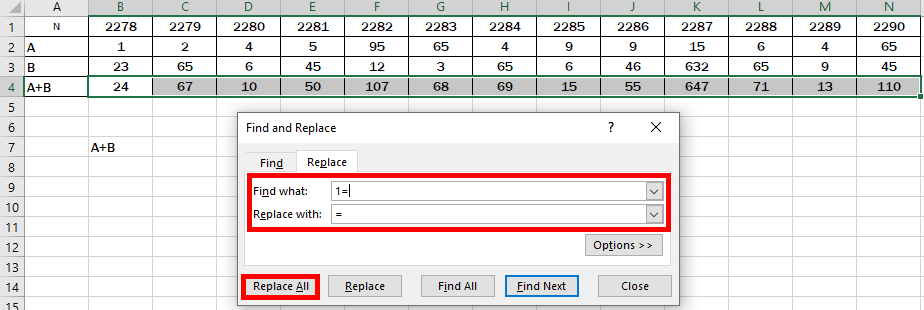
- First, Select the cells you want to transpose, and click on Find and Replace button on the Home tab (You can also hit Ctrl + H to trigger the Find and Replace function)
- A window will pop up, there under Find what type =, and under Replace with type 1=. Then hit Replace all and Close the window.
- Now, Select the newly modified cells again and Copy them using Ctrl + C
- Click on the cell where you would like to transpose them and right click, then click on Paste special > Transpose to paste transposed cells.

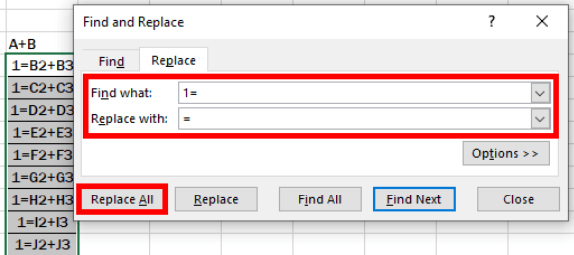
- Select the transposed cells and again open Find and Replace (Ctrl +H), this time under Find what type 1=, and under Replace with type =. Then again hit Replace all and Close.
Good Job! The cells are pasted and transposed while the formulas keep the references!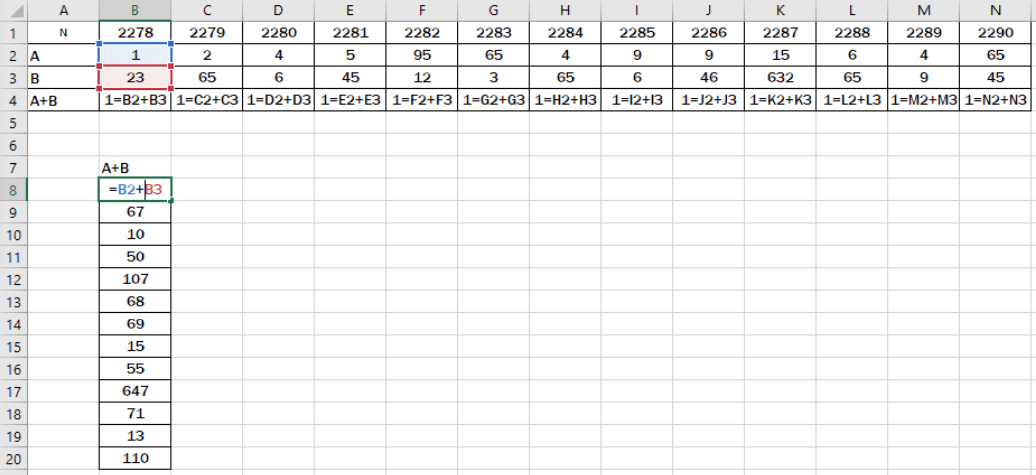
Paste transpose in Excel and keep the values referenced from the original cells.
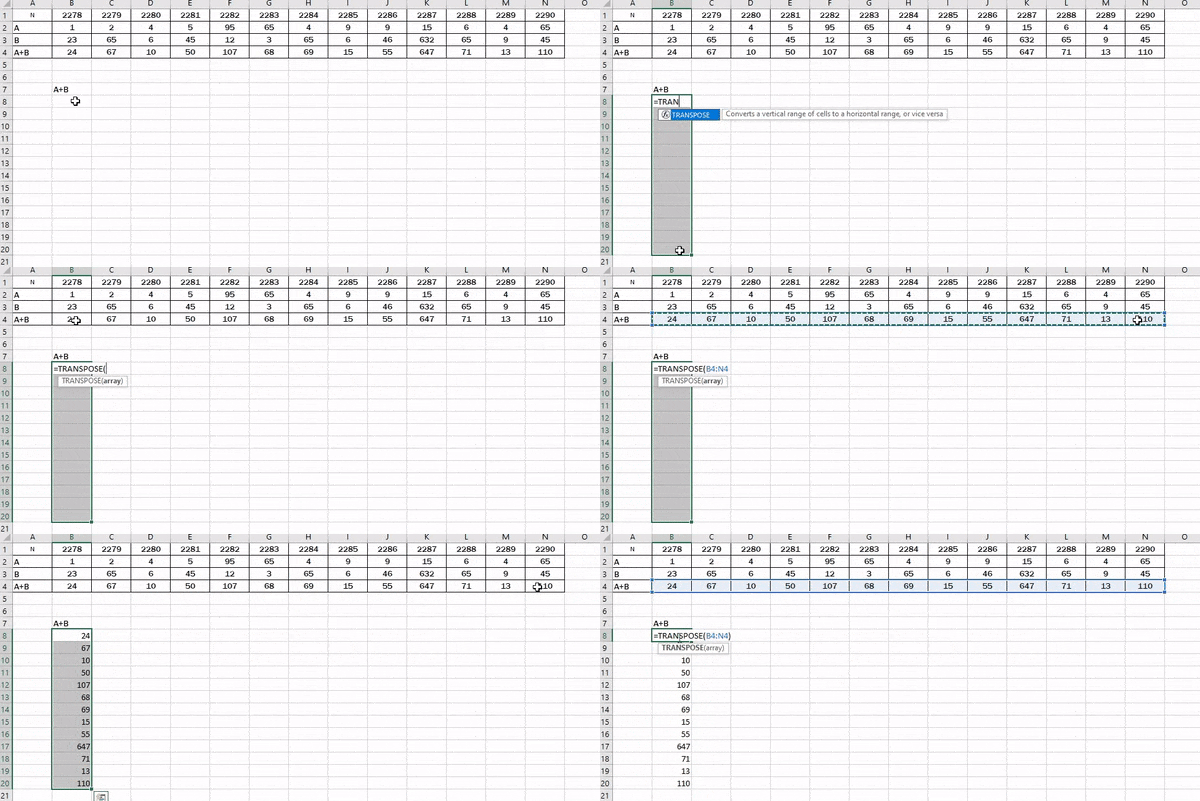
To transpose Column to row or vice versa in Excel while keeping the values referenced we will use the TRANSPOSE function. We can do this by Copy/paste transpose but this will create duplicate data. If you don’t want this fallow these steps:
- First, select the same number of cells as the original set. In our example, we need 13 horizontal cells.
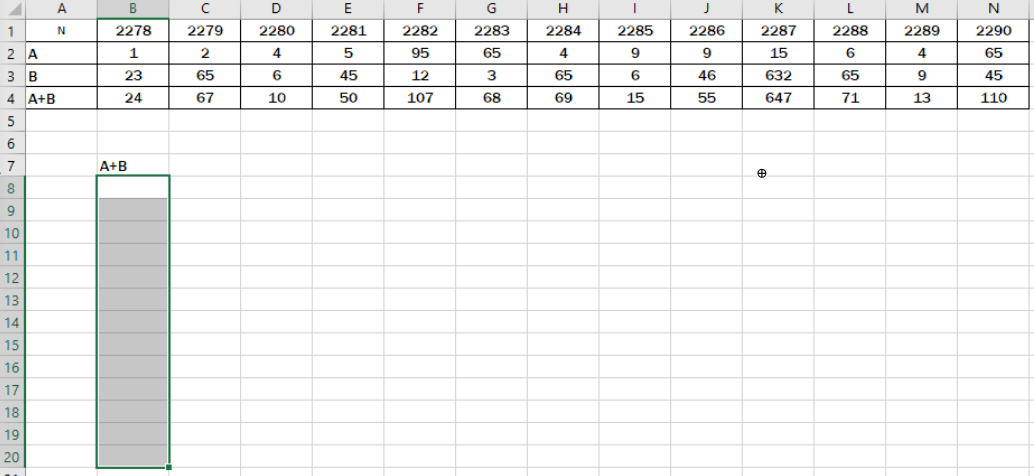
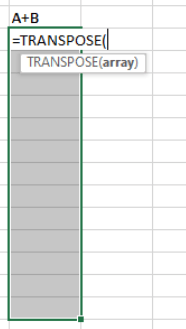
- Now while those cells are selected type =TRANSPOSE(
- Make sure all cells are still selected and then type in the range of the original cells. In our example, it would be =TRANSPOSE(B4:N4)
- STOP! DON’T HIT ENTER!
- Finally, hit Ctrl + Shift + Enter. The TRANSPOSE function is only used in array formulas, this is the way to finish an array formula, so it will be applied to more than one Cell.
Great! Now the cells are transposed and retain a reference to original cell values!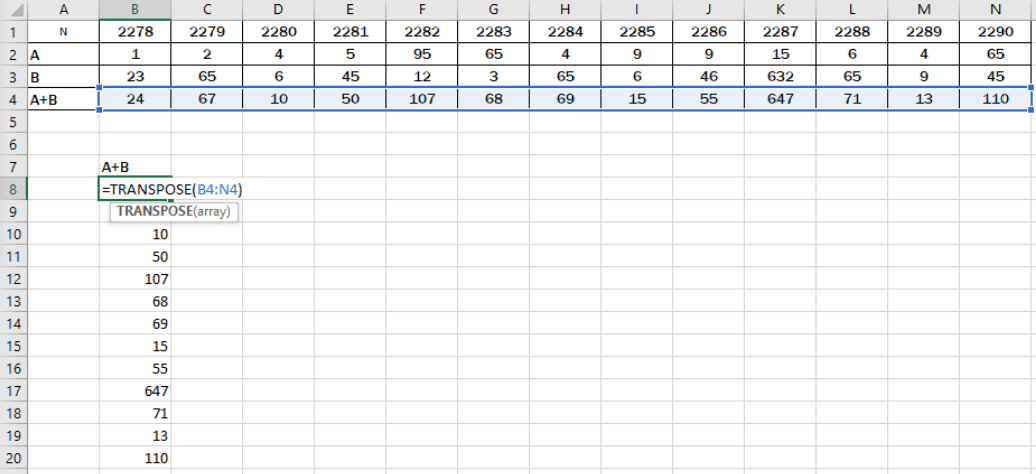
Learn more useful Excel Tricks here! And don’t forget to share your new knowledge with others!

